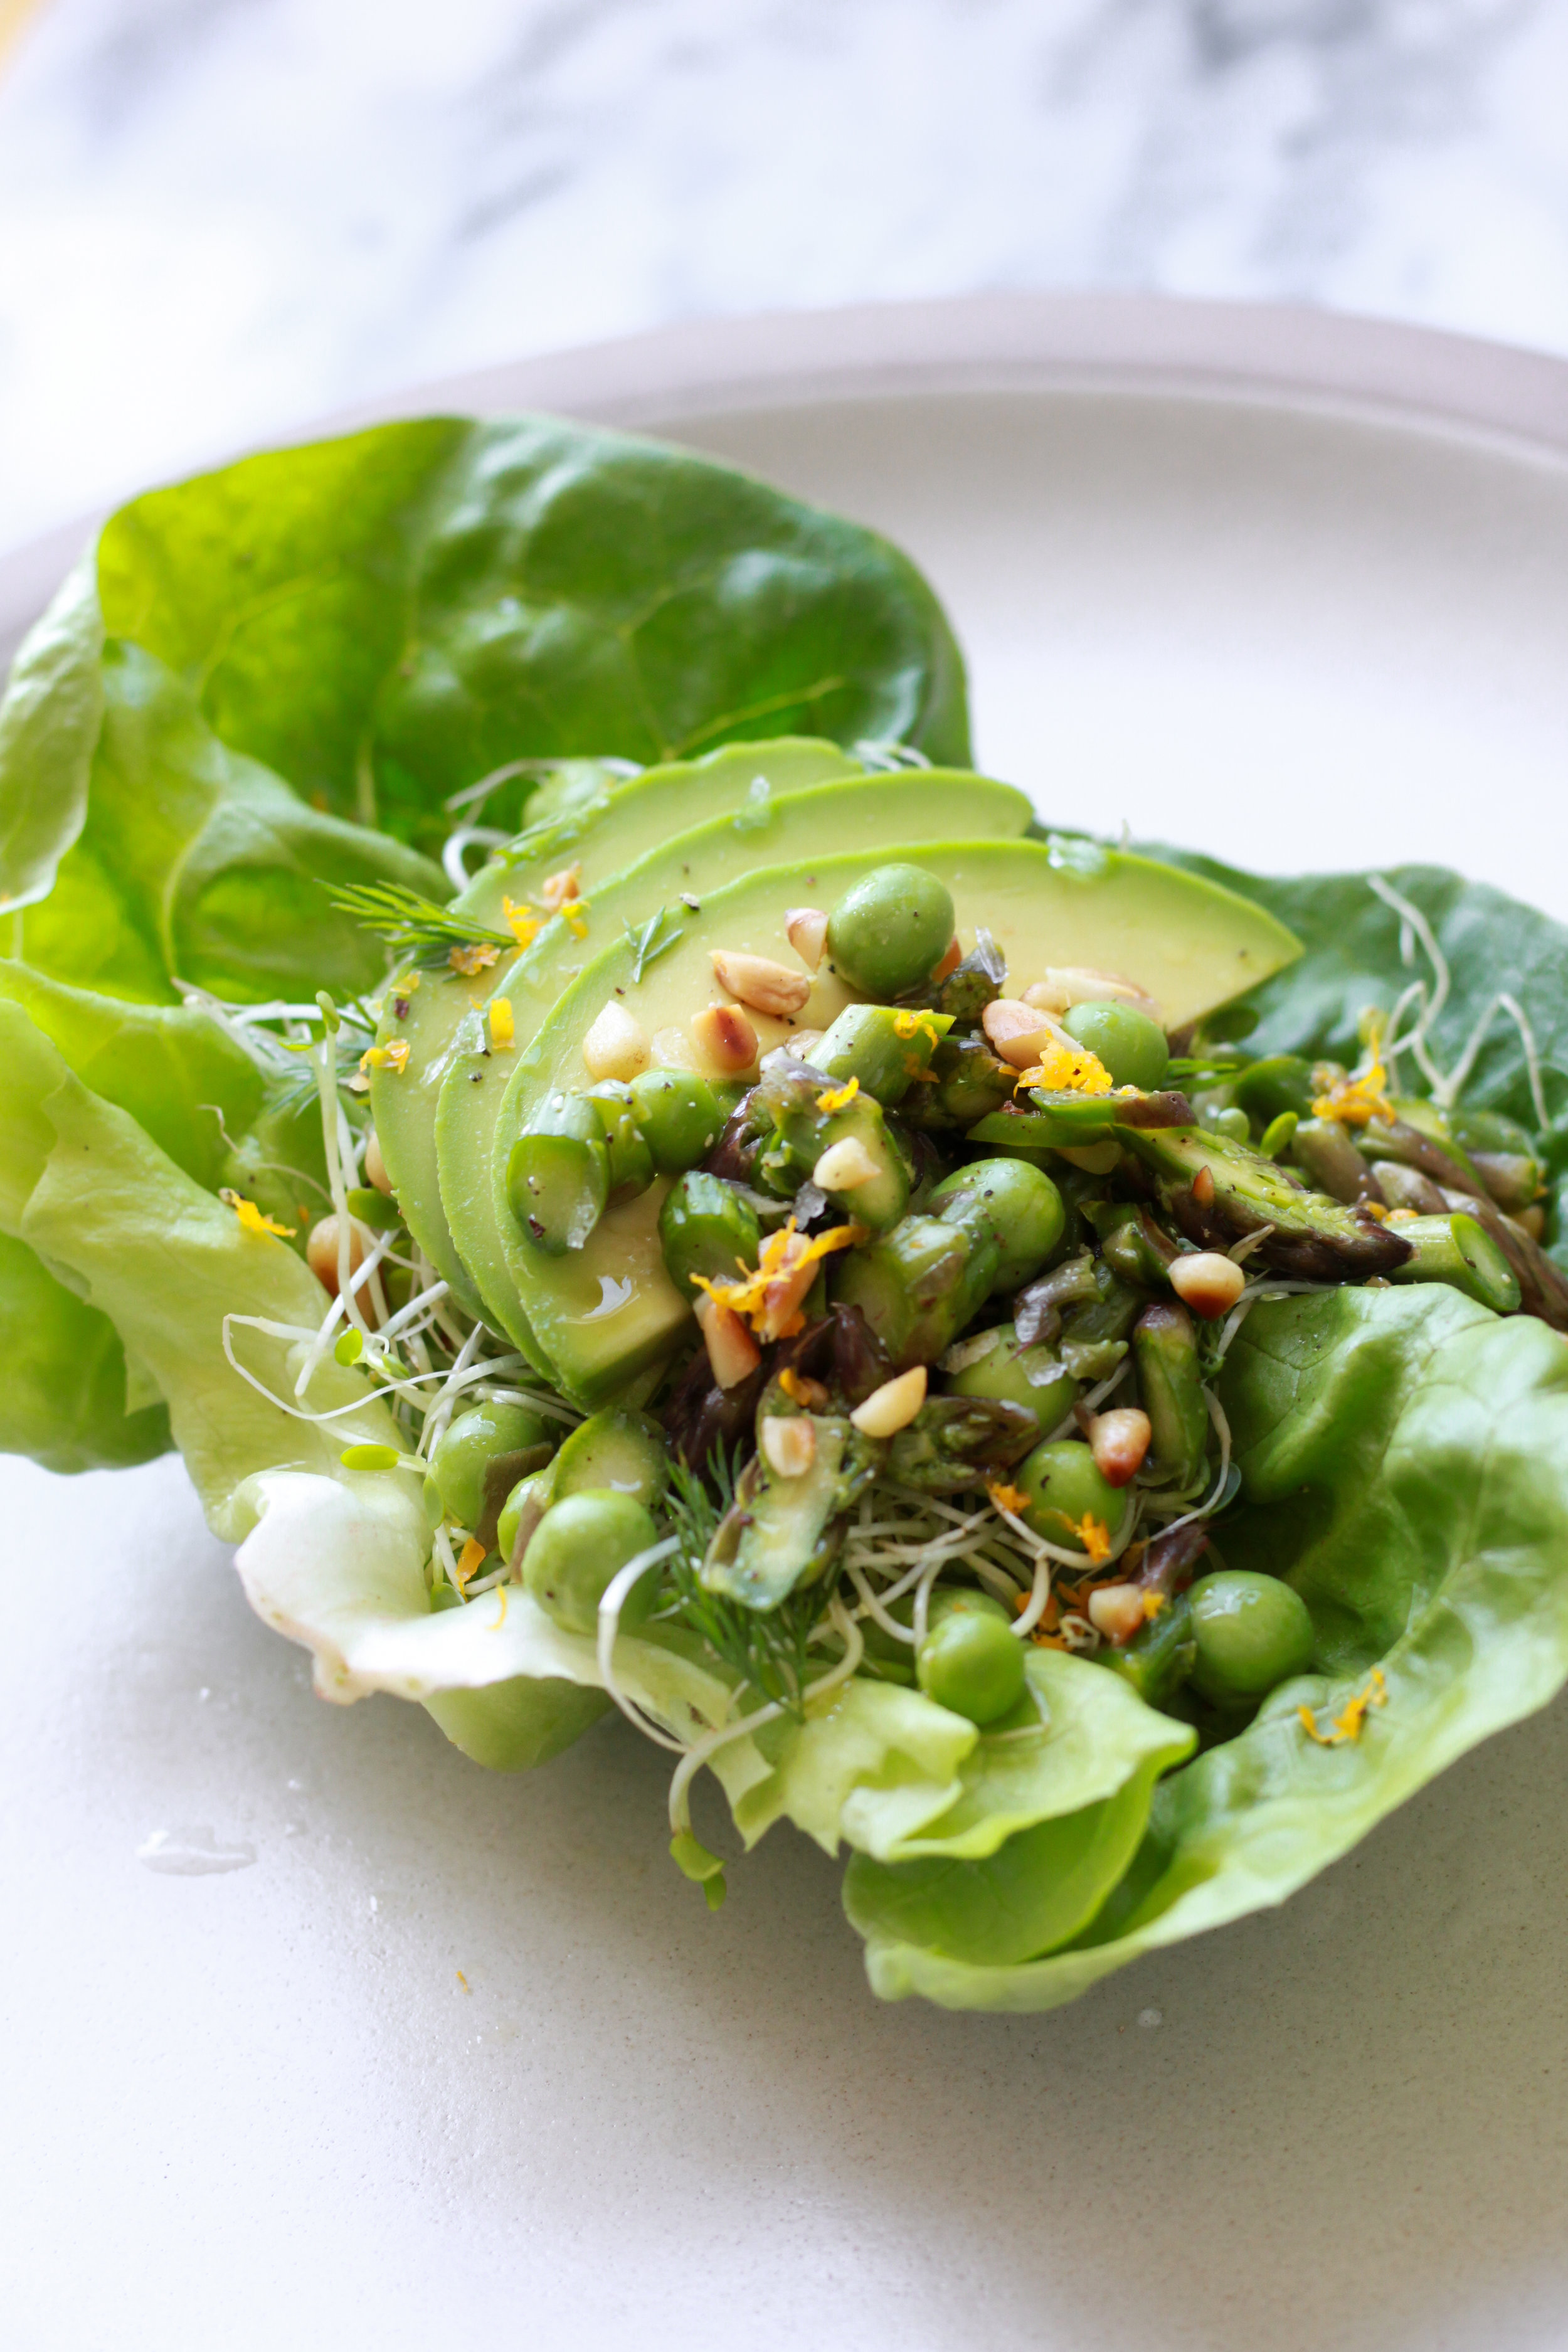
Spring Green Veggie & Herb Lettuce Cups

lettucecups1.jpg
asparagus1.jpg
englishpea.jpg

Super simple and fresh, this is essentially a handheld salad that celebrates the early bounties of spring.

I opted to stick with lemon and olive oil for the dressing to let the brightness of the vegetables shine through; if you’re keen to douse the lettuce cups in tahini or have a green goddess or other dressing that you like, definitely do!

Great as a side dish, these lettuce cups can easily become a full meal by mixing in some flaked salmon, chickpeas or other protein of choice. Happy spring!

untitled (6 of 11).jpg
asparagus2.jpg
lettucecup2.jpg
lettucecup3.jpg
lettucecups_duo.jpg

Spring Green Veggie & Herb Lettuce Cups
Makes 4 lettuce cups

Ingredients
1/2 bunch asparagus
1/2 lb English peas (in their pod)
1 Meyer lemon
2 Tbsp. pine nuts
2 Tbsp. olive oil
1/4 cup mixed herbs (mint, dill, chives, parsley, chervil are some nice options), roughly chopped
1 avocado, sliced
a few handfuls alfalfa sprouts
4 large butter lettuce leaves
salt & pepper

Directions
1. Cut off the bottom woody ends off the asparagus (1”-2” up from the bottom) and discard. Cut each asparagus stalk into 1/4” slivers at an angle and put into a medium sized bowl.
2. Zest the lemon and set zest aside. Squeeze the juice from the entire lemon over the asparagus. Add a couple pinches of salt, toss and set aside.
3. De-pod the English peas, adding the peas to the bowl with the asparagus as you go. Mix the two together.
4. In a small pan, toast the pine nuts over medium-low heat until golden brown, 5-7 minutes, stirring or tossing frequently. Once they’re golden, transfer immediately to a cutting board so they don’t burn. Roughly chop.
5. Add the olive oil, lemon zest, 3 Tbsp. of the chopped herbs and a few grinds of black pepper to the asparagus and peas. Stir to combine. Taste and adjust salt and pepper as needed.
6. Assemble the lettuce cups: In each butter lettuce leaf, place a layer of alfalfa sprouts, slices from 1/4 the avocado, and a couple spoonfuls of the asparagus and pea mixture (and its lemon-oil-herb dressing). Finish off with a few pinches of chopped pine nuts and the remaining fresh herbs.

Heirloom Tomato, Apricot & Cucumber Salad with Yogurt & Za'atar

OH HEY, IT'S SUMMER! This basically means you don't have to cook at all if you don't want to, because everything is luscious and ripe and can be sunk into off the vine with your teeth (no silverware necessary).

This salad is a celebration of the ease of summer eating and the inherent vibrant flavors that make the produce this time of year shine. It is a cooling salad with some Middle Eastern vibes because they're my favorite (full disclosure of cuisine bias here). The one ingredient with which you may be unfamiliar is za'atar, which is a Middle Eastern spice blend made of thyme, oregano, sesame seeds, sumac and salt. It's delicious! You can make your own or buy a jar at specialty spice shops or Middle Eastern markets.

I've also used unusual varieties of cucumbers and tomatoes here because they're fun and you can only get them during the summer! If you can't find them, don't sweat it; a normal, ripe, preferably relatively local cucumber or tomato will do the trick just as well. Enjoy!

Heirloom Tomato, Apricot & Cucumber Salad with Yogurt & Za'atar
Serves four as a starter or two as a main

Ingredients
3 medium heirloom tomatoes, cut into large wedges
4 apricots, pit removed and cut into quarters
1 avocado, cut into 1/2" cubes
2 lemon cucumbers or 1 painted serpent cucumber (or 2 Persian cucumbers, failing those), cut into 1" chunks
6 Tbsp. plain whole milk Greek yogurt
1 Tbsp. good quality cold-pressed olive oil, plus more for drizzling
2 Tbsp. mint, roughly chopped
2 Tbsp. dill fronds
1 lemon
1 Tbsp. za'atar
salt + pepper

Directions
1. In a small bowl, mix together the Greek yogurt, 1 Tbsp. olive oil and a pinch of salt.
2. Spread the yogurt mixture on the bottom of your serving platter.
3. Arrange the slices of tomato, avocado, apricot and cucumber together on top of the yogurt. Scatter herbs and za'atar on top.
4. Finish off with a generous drizzle of olive oil, the juice of half a lemon, salt and pepper. Adjust to taste.

Sweet or Savory Ancient Grain Porridge (with Dates, Pear & Pomegranate)

This porridge is inspired by a divine, 5 grain porridge at a local cafe called Bartavelle. I love its robust texture and heartiness and have been attempting to sufficiently replicate it at home for the past two years. In addition to being super satiating because it is made of whole grains and seeds, which are packed with protein, fiber and healthy fats, it is also GLUTEN-FREE! Horray.

To simplify things, I've scaled the porridge down to four "grains": Quinoa, amaranth, flax and brown rice. Most of these are actually seeds, but "Sweet or Savory Seed Porridge" sounded kind of like a thing for birds...so we'll go with the common misconceptions. Quinoa is one such seed that is generally acknowledged as a grain. It is also one of the few plants that contains all 9 essential amino acids that make a complete protein. Similarly, Amaranth is a tiny seed that behaves like a grain and was a staple food of the Aztecs. It has a toasty flavor, is also a complete protein, and is rich in iron, calcium and vitamin C. Flax seeds are revered for their high omega-3 content, which is a type of essential fatty acid that is necessary for healthy functioning and can only be obtained through the foods we eat. Flax is also a great source of fiber, antioxidants and minerals including manganese and magnesium. Brown rice is delicious. And, unlike white rice, contains a hefty amount of fiber to help keep our guts and hearts healthy!

Eaten straight with no salt, this porridge is incredibly savory. When you add salt it's still savory, but tastes a lot better. I love adding a generous teaspoonful or two of melted ghee to the porridge regardless of my toppings, as its rich toasty flavor balances out the earthiness of the "grains" super well. If you don't have ghee, you can use browned or melted butter. From there, the toppings are up to you!

Sweet or Savory Ancient Grain Porridge (with Dates, Pear & Pomegranate) 
Serves two

Ingredients
Porridge
2 1/2 Tbsp. short grain brown rice
2 1/2 Tbsp. quinoa, any color
2 Tbsp. amaranth
1 Tbsp. flax seeds
generous pinch or two sea salt

Sweet
Ghee
Chopped dates
Pure maple syrup
+ Seasonal fruit toppings
Pear slices
Pomegranate seeds

Savory
Ghee or cold-pressed oilve oil
Soft boiled egg
Flaky or herbed salt
Gomasio
+ Seasonal veg toppings, if desired
Sauteéd mushrooms
Caramelized onions
Sauteéd kale

Directions
1. If you can have the foresight, soak the quinoa, brown rice and amaranth overnight (but not the flax) in filtered water with a splash of lemon or apple cider vinegar. In the morning, strain and rinse well.
2. If you weren't able to soak the grains overnight, the porridge will still work! It just won't be activated. Place the grains in a fine mesh strainer and rinse, rubbing them together with your hands to clean thoroughly. 
3. Place the rinsed grains in a small pot, add the flax and 1 cup of water. With the pot covered, bring to a boil, reduce to a simmer, and let cook undisturbed for 25 minutes.
4. Turn off the heat and let the porridge sit, still covered, for 10 minutes.
5. Add salt to taste. Finish off with sweet or savory toppings and enjoy!

SQIRL's "The Sprouty Pod"

I have a habit (perhaps personality trait?) of becoming vehemently promotional of the things I love. If I find out that you have never seen My So-Called LIfe, I will likely exclaim, "WHAT?!?", take a deep breath, detail all of the reasons why it is the best television show ever created and then generously force the DVD box set upon you. I can talk for hours about the depths of my love for Sufjan Stevens, complete with commentary about why The Age of Adz is his most underrated album. If you live in or travel to Los Angeles, I will implore you to eat at Sqirl; if you aren't in its vicinity, I will direct you to their menu online—attempting to connect you with a sliver of the experience of being there.

Sqirl fills up an unreasonably large portion of my heart. Chances are, if you're appraised to current food/restaurant trends, live in LA, or know me personally, you've heard of it. If you haven't, here's a snapshot: Sqirl is a tiny, bright and booming breakfast and lunch joint on the east side of Los Angeles, which serves up some of the most playful, innovative, fresh and flavorful food I've ever had the pleasure of eating—and possibly being made in America today.

I first heard about Jessica Koslow in 2012, a year after she had started an unusual little jam company called Sqirl (as in, "squirrel away"). As a burgeoning foodie and lifetime creative who was spending my free time making things like rosemary cashew butter from scratch, I was instantaneously compelled by Jessica's seasonal and atypical jams, like blueberry tarragon and strawberry rose geranium. Not long after Sqirl got its legs, Jessica expanded it into a simple breakfast spot for people to gather and enjoy her beguiling jam in the best way possible: on toast. But not just any toast. A cartoonish-ly thick slice of locally made brioche, with the jam sometimes nestled amongst heaps of house made ricotta or hazelnut almond butter to boot. Something magical was happening here. People were starting to talk.

When I moved back to LA from London in the summer of 2013, Sqirl was on my shortlist of new restaurants to check out and possibly approach about kitchen work. Scoping it out and grabbing a bite as soon as I was able, I became instantaneously smitten. From the painstakingly handwritten chalkboard menu to my bright and flavorful spiced carrot socca pancake topped with zippy fresh greens to the barista who gave me a complimentary house made almond milk latte after I had inquired about their almond milk ingredients and process, everything about Sqirl glimmered with vibrancy, intention, generosity and love. Sqirl is generous in its portions. It is generous in its commitment to local and ethical sourcing and the farmers with whom it works. It is generous to the earth through its seasonally changing menu. It is generous in its exuberance for its community. When I met Jessica that summer and found out they weren't hiring, she generously offered to connect me to some friends who own a locally revered bakery instead. She is becoming food world famous and she still stops to say hi when we cross paths, still remembers me every time.

While I have a lot of love for the heart of Sqirl, I have just as much love for the food that Jessica and her amazing team create. Almost every element of every dish is made in house. They pander to the indulgent and the health conscious in equal measure, with equal exuberance. They draw from culinary palates and traditions spanning from Asia to California to the Middle East. They make vegetarian dishes hearty and vegetables taste amazing (not to mention their baked goods). I could not have been more excited when I heard they were releasing a cookbook. When I found out that it would be titled Everything I Want To Eat, I thought, "Yes! Duh." That statement literally epitomizes how I—and from the looks of it, many other people—feel about Sqirl. Good move, Jessica.

Everything I Want to Eat: Sqirl and the New California Cooking is a strange and beautiful book. It includes recipes for every type of diet and level of culinary experience, from the complete novice to the person who literally cannot wait to beet cure her own salmon. Its images are more closely related to pop art than on-trend food photos; as the review in the New York Times notes, "The book itself looks less like a cookbook than an exhibition catalogue". 

The dish I'm sharing with you here is disarmingly delicious. You figure it'll be tasty because it's composed of a lot of individual tasty things thrown together on one plate, but then you take a bite and your brain is like, WHAT IS THIS?!? Because the way the flavors play together in your mouth, the zippy punch of the cilantro pistou clashing against the caramelized sweetness of the squash and the earthy toastiness of the buckwheat and the thick, creamy tang of the labneh is something your mouth has never experienced before. The other thing that I love about this recipe is that it can be either quick and easy or moderately involved, depending on what you feel up to. Jessica explains how to turn yogurt into labneh and dried mung beans into sprouts, but if you don't have the time, energy or curiosity for those processes yet, then just go ahead and buy some thick greek yogurt and mung bean sprouts. It comes together much more quickly than its long title would have it seem.

If you live in or are ever visiting Los Angeles, I implore you: eat at Sqirl. And wherever you are, get yourself a copy of Everything I Want to Eat from your library, local bookstore or the Internet. Take it into your kitchen and let its strange wonders into your life. And if you're pressed for time, you can always start with this recipe, right here.

The Sprouty Pod —
Mung bean sprouts, crunchy buckwheat, and roasted delicata squash with pomegranate, labneh, and cilantro pistou

from Everything I Want to Eat: Sqirl and the New California Cooking by Jessica Koslow
Serves 6 as a light lunch or a first course

Ingredients
Crunchy Buckwheat
1/2 cup hulled buckwheat groats

Roasted Delicata Squash
2 large or 3 small delicata squash (3 lbs total)
3 Tbsp. extra-virgin olive oil, plus more for drizzling
1/2 tsp. ground coriander
Fine sea salt and freshly ground black pepper

Cilantro Pistou
1 clove garlic
2 Tbsp. fresh lemon juice
1/4 tsp. fine sea salt
1/2 bunch cilantro
1/3 cup (80 ml) extra-virgin olive oil

To Serve
1 clamshell mung bean sprouts (see the book for how to sprout your own)
1 cup labneh or plain whole milk Greek yogurt (I love and used Straus) (see the book for how to make your own)
1 cup pomegranate arils
1/2 bunch cilantro
Really good olive oil
2 limes, halved
Fleur de sel

Directions
Crunchy Buckwheat
1. Preheat the oven to 350F/175C.
2. Spread the buckwheat out on a dry, rimmed baking sheet. Toast in the oven until golden brown and crunchy, about 10 minutes.

Roasted Delicata Squash
1. Adjust the oven temperature to 425F/220C.
2. Cut the squash in half lengthwise. Scoop out and discard the seeds, but do not peel the skin—it's tender and delicious.
3. Cut the squash into 2- to 3- inch chunks (I botched this direction; don't follow my photos) and set on a rimmed baking sheet. Toss with just enough oil to barely coat, about 3 Tbsp. Sprinkle the coriander evenly over the squash pieces. Season lightly with salt and a few grinds of pepper.
4. Bake until tender all the way through and a little caramelized on the bottom, 30 to 40 minutes. Let cool.

Cilantro Pistou
1. In a blender, combine the garlic, lemon juice, and salt. Blend on low speed until the garlic is finely chopped and mostly incorporated into the lemon juice.
2. Cut the sprigs of cilantro right at the point where the leaves start branching from the stems. Take the leafy top part and drop it into the blender. Blend on the lowest speed until the cilantro is coarsely chopped and there are still big pieces of leaves, about 10 seconds.
3. Gradually increase the speed while you slowly pour in the oil. Once you've added all the oil, blend on high speed for 20 seconds. The pistou will be emulsified and flecked with green cilantro leaves.
*(You can also make it by hand, first chopping the garlic and herbs, then whisking the lemon juice and oil together.)

To Serve
1. Schmear 1 to 2 Tbsp. of the labneh in the bottom of each bowl. Scatter a small handful of sprouts and pomegranate seeds over the labneh, then drizzle with 1 to 2 Tbsp. of the pistou.
2. Top with a few pieces of squash, more sprouts and pomegranate seeds, and a spoonful of crunchy buckwheat.
3. Sprinkle some cilantro leaves over everything. 
4. Finish with a drizzle of oil, a final spoonful of pistou, a strong squeeze of lime juice and a pinch of fleur de sel.

Roasted Sweet Potato, Black Bean & Pickled Persimmon Tacos

taco_vert.jpg

It feels a little ridiculous to post photos of food on Instagram right now, to share recipes, to have conversations that are about anything other than the political, social, economic and emotional state of America. But we need to eat. And we need to create. As people mobilize and artists of all kinds use their uniquely magical expressions to make sense of and shape our world, I am continuing to do what I do. Because the world keeps spinning and every act of generosity, thoughtfulness and nourishment counts. So here are some seasonal, mildly wacky, California style tacos. Beans from scratch that are infused with flavor by boiling them with spices and plant based aromatics. Sweet winter persimmons turned into tart pickled bursts of flavor. Food transformed through ingenuity, patience, care, attention, time. We will get there, America. There are too many of us with abundant love, compassion and power for it not to be so.

Full essay here.

//

Roasted Sweet Potato, Black Bean & Pickled Persimmon Tacos
Serves 4
*Note: The black beans need to be soaked in water the night before and the pickled persimmon, while a quick pickle, takes 2 hours of soaking time in the brine before it's ready. Plan accordingly! :)

Ingredients
Pickled Persimmon
1 large or 2 small persimmons, diced into 1/4" cubes
1 cup unfiltered apple cider vinegar
1/4 cup + 2 Tbsp pure maple syrup or honey
1 Tbsp. sea salt
1 tsp. mustard seeds
a few peppercorns
1" knob ginger root, peeled and sliced thin

Black Beans
1 cup dried black beans, soaked overnight
1 large carrot, chopped in a few big chunks
1 large garlic clove, smashed
1/2 yellow onion, peeled
1 cinnamon stick
1/2 tsp. whole coriander
1/2 tsp. whole cumin

Roasted Sweet Potato
1 large sweet potato, diced into 1/4" cubes
1/2 Tbsp. coconut oil or ghee
salt & pepper

To Serve
8 corn tortillas (make sure the only ingredients are corn, water and lime, if possible)
avocado (I made an avocado creme by blending guacamole ingredients in a blender)
cilantro
lime

Directions
For the Pickled Persimmon
1. Combine all ingredients except the persimmon in a small saucepan and set over high heat. Bring to a boil, stirring occasionally.
2. Once it's boiling, reduce to a simmer and cook for 10 minutes, stirring occasionally.
3. While the brine is cooking, put the diced persimmon in a clean glass jar with a lid.
4. After 10 minutes, pour the brine into the jar with the persimmon. Let cool.
5. Once cool, put on the lid and refrigerate. It will be ready in 2 hours.

For the Black Beans
1. Rinse the beans (which you have soaked overnight) and discard any split or broken ones.
2. In a small skillet over medium heat, toast the cumin and coriander, swishing in the pan frequently, for 3-5 minutes (you'll know they're ready when they darken a bit in color and become quite fragrant).
3. Put the spices in a loose tea holder or make a sachet for them out of a small bit of cheesecloth. You can also put them directly in the water, you just may have to fish them out later (or get a big bite of spice in your taco).
4. Combine all of the bean ingredients in a large pot and submerge in water, about 2" above the beans. Bring to a boil, reduce to a simmer and cook until tender, about 45 minutes. If foam collects on the surface of the water, skim it off.
5. When the beans taste almost soft, add a very generous few pinches of salt to the water.
6. Once the beans are cooked to the consistency you like, turn off the heat and let them cool in the water. 
7. When ready to eat, drain the water and discard the aromatics. Taste and add salt if needed.

For the Sweet Potato
1. Preheat oven to 400F.
2. Line a baking tray or roasting dish with parchment or aluminum foil. 
3. Toss sweet potato cubes in oil (melt it first if it is solid) and sprinkle generously with salt and pepper. Spread them on the baking sheet in an even layer, so every cube has a surface touching the metal.
4. Roast for 15 minutes. Carefully toss. Roast for 10 minutes more and check for doneness. Sweet potato should be soft with some browning on its outer edges.

Assembly
1. I like charring my tortillas over an open flame on the stove. Do this carefully if you choose to try it, please! 
2. Pile beans, sweet potato and persimmon onto tortillas. Avocado/guacamole, cilantro and a generous squeeze of lime are all nice finishing touches.

Bright Beet Hummus with Bee Pollen, Hemp Seeds and Fleur de Sel

I made some hummus. And I put beets in it because who doesn't want to eat food that is beautifully and naturally bright pink?! Also, some may argue that it makes the hummus extra delicious (and undeniably extra nutritious). I originally assembled this hummus for its glamour shots in a bowl with some minced parsley, swirls of olive oil, and the company of crackers and crudités, while snacking on some leftover brioche that I had in the freezer from an earlier project (because photographing food whilst hungry is dangerous business and I do not recommend it to anyone). The styling and shots were mediocre at best. As I glanced over at the leftover toast, the synapses in my brain fused together its playful shape and pallid palette with the fuchsia hue of the hummus, imagining the eye candy taken even further by the addition of bright yellow pellets of bee pollen and greenish white hemp seeds. Suddenly my party appetizer dip turned into a breakfast toast that was visually suggestive of white cake with pink frosting and sprinkles! 

Sometimes it's good to shake things up a bit. Trust your intuition. Sneak vegetables into your breakfast. Make your food look like a party because it engages your creativity, it's a simple pleasure, it makes life more fun. If you don't have bee pollen or hemp seeds, don't sweat it. Sprinkle some other things that you do have onto this toast and see how they taste. Or stick with the classics and eat the hummus with crackers, cucumber sticks, pita, whatever. Either way, you'll still be eating a food that is delicious, super nutritious and bright freakin' pink, so at the very least you can marvel at that!

Bright Beet Hummus with Bee Pollen, Hemp Seeds & Fleur de Sel
Serves 6-8 as a starter, or enough for many mornings of toast

Ingredients
Hummus
1 1/2 cups cooked chickpeas (from about 3/4 cups dried chickpeas, cooked following this method)
2 medium beets
2 cloves garlic, minced
1/2 cup tahini, preferably unhulled
1/4 cup lemon juice, fresh squeezed (from about 1 large lemon)
1/2 tsp. sea salt
6 Tbsp. ice water

Toppings (get creative!)
Bee pollen
Hemp seeds
Fleur de sel, Maldon or other finishing salt
Parsley
Mint
Toasted walnuts

Directions
1. Preheat oven to 400°F. Chop stems off beets, scrub thoroughly and wrap beets in tin foil. Place on a baking sheet and roast until they are tender and can easily be pierced with a fork, 45-60 minutes. Carefully flip beet parcel over halfway through the roasting to make sure the bottoms don't burn. Once they're tender, remove from oven, unwrap foil and set aside to cool. (You can do this step a couple days in advance.)
2. Place cooked chickpeas in a food processor (if you're using canned ones, make sure you rinse them off first!) and blitz until they become a stiff paste. You may need to start and stop it a few times to scrape down the sides with a spatula until the desired consistency is reached.
3. Once the beets are cool enough to handle, use your thumbs to push/slide off the skins. Chop them into medium sized cubes.
4. Add beets to food processor and blend until thoroughly combined with the chickpeas.
5. Add tahini, lemon, garlic and salt and blend until combined, stopping to scrape down the sides when necessary.
6. With the motor running, slowly stream in the ice water, 1 Tbsp. at a time, stopping after 4 Tbsp. Let the food processor run for about 5 minutes, until the hummus is super smooth and creamy. Taste and assess the consistency and flavor. If you'd like it thinner, add more ice water. Add more salt, lemon and garlic to your taste preference and blend until smooth.
7. Garnish with whatever fits your fancy and enjoy!

Summer Stone Fruit, Cherry Tomato & Chickpea Tabbouleh

Tabbouleh is a Middle Eastern salad composed of mostly parsley, speckled with bulgur, tomatoes, onion and a hefty zing of lemon. In less traditional versions, you may see mint and cucumber thrown in too. I put a very unorthodox spin on this tabbouleh, harnessing on the bounties of summer and tossing in some California flair. Peaches because they're fragrant and delicious; black chickpeas because, hello, BLACK CHICKPEAS!?! and because I'm a fan of fiber and plant protein; and quinoa instead of bulgur because it's gluten-free, so more bellies can enjoy it. It’s a total party in a bowl of bright, sweet, juicy, and fresh flavors and textures. Summer incarnate. Enjoy!

Summer Stone Fruit, Cherry Tomato & Chickpea Tabbouleh
Serves 4

Ingredients
1/2 cup quinoa
1/2 cup dried chickpeas, black or white (or a can of chickpeas if you don't want to cook your own)
2 ripe peaches or nectaries
2 Persian cucumbers
1 cup cherry tomatoes
1/2 cup minced mint
1/2 cup minced parsley
1/2 bunch chives, minced
1 lemon
high quality cold-pressed extra virgin olive oil

Directions
If you are cooking the chickpeas from dried:
1. The night before, put dried chickpeas in a very large jar and fill it with water and a splash of apple cider vinegar.
2. Once the chickpeas have soaked for 12 hours, drain and rinse them.
3. Place chickpeas in a large pot and cover 2" above with fresh water. You're welcome to throw in some smashed garlic, half an onion, a carrot or celery, a bay leaf, a cinnamon stick, or a sachet with any spices you like to enhance the flavor.
4. Bring the water to a boil, reduce to a simmer and let chickpeas cook until tender, 40-60 minutes. If the water level sinks to the surface of the chickpeas, add more water. If white foam collects on the surface of the water, skim it off with a spoon.
5. When the chickpeas are tender, strain and rinse them and remove any aromatics you added to the pot.
6. Congratulate yourself for cooking chickpeas from dried and marvel in how much better they taste than the canned ones! 

To assemble the salad:
1. Rinse quinoa and place in a small pot with 3/4 cup + 2 Tbsp water. Bring water to a boil, reduce to a simmer and cook, covered, for 15 minutes. When the time is up, turn off the heat and let the quinoa sit, covered, for 10 minutes.
2. While the quinoa is cooking, prep your produce. Chop your peaches or nectarines and cucumbers into 1/4" cubes. Quarter your cherry tomatoes, making an X with your knife from the top down. Mince your herbs, if you haven't already.
3.  When your quinoa and chickpeas are ready, add a generous drizzle of olive oil, squeeze of lemon and hefty pinch of salt to each. Toss to coat.
4. Combine all ingredients in a large bowl. Taste and add more olive oil, lemon and salt as needed.

Tahini Honey (Halva) Macaroons

It's a little crazy, how many years I had been eating hummus before I knew what tahini was. It was never a part of my childhood pantry and, as I only ever encountered it blended into a delectably creamy mess of chickpeas, lemon and garlic, I suppose it makes sense that I hadn't heard of it until I started getting into food in my mid-20's. 

I remember discussing tahini with a friendly employee at my local independent market when I was living in London and how enthusiastically this young, bearded, flannel-wearing Canadian man extolled its virtues. My brain struggled to wrap itself around the fact that A) there was an equivalent of peanut butter made out of sesame seeds and, B) that it was the second main ingredient in a culturally relevant dip that I had been enjoying my entire life. I hastily bought a jar, trotted home, opened it, dunked in a spoon, put the creamy paste to my mouth and—BLEH!!—almost spit it out. It was SO BITTER! I could not comprehend who would voluntarily eat this stuff, let alone recommend it to other people.

Needless to say, I eventually wholeheartedly boarded the tahini train. The turning point came almost a year later when a new friend (incidentally, also Canadian) asked me if I wanted some halva—a Middle Eastern treat which I had also never heard of. Shaped into a bar with the consistency of snappy nougat, this mysterious dessert is traditionally made with two ingredients: tahini and honey. Little did I know it, but this was a watershed moment. Halva changed my life.

Let's just take a moment to appreciate the divine relationship of these two ingredients. Have YOU ever mixed tahini with honey (and a pinch of salt) and spread it on toast…or eaten it with a spoon? Game changer. For real. (On a side note, don't ever buy the commercially packaged halva you typically see in grocery stores or Middle Eastern markets, as it's loaded with corn syrup and other junk. If you're curious to try it—which you totally should—make sure the only ingredients on the package are sesame and honey. Or get it from an outdoor market in Israel, where it is a whooooole other level of cloud-like, melt in your mouth deliciousness.)

A Tale of Two Tahinis

As I began to fully integrate tahini into my life, I quickly learned that there are two different types of tahini: hulled and unhulled. But what does this even mean? What is the difference in flavor, consistency and nutritional value?

The easiest way to understand it is to liken the sesame seed to a grain of wheat, as they both have an outer shell that contains a hefty portion of their nutrients. When this outer bran is removed from a grain of wheat, we get white (or "all purpose") flour; when the outer shell of the sesame seed (called the "hull") is removed (as shown in the middle sesame seed photo above), we get a lighter, more refined version of tahini. This is hulled tahini. Unhulled tahini is like whole wheat bread: thicker, darker, maybe not as sweet and tasty, but packed with way more nutrients.

For such a tiny thing, sesame seeds are actually an incredible source of copper, calcium, magnesium and iron. While the hulled seed still contains some of this nutritional value, it is no longer a whole food and much of it is lost. Take the calcium, for example. According to WHFoods, one tablespoon of unhulled sesame seeds contains about 88 milligrams of calcium (for perspective, one tablespoon of whole milk only contains 17 mg of calcium; maybe we should start feeding our youths sesame milk instead?). Once the hull of the sesame seed has been removed, the calcium content plummets to about 37 milligrams, which is 60% less! 

Unfortunately for us, most commercial brands of tahini are made out of hulled sesame seeds because they blend more smoothly and are less bitter in taste. Unless your jar of tahini says "unhulled" or "whole" in front of the word "sesame" on the front or in the ingredients list, it's safe to assume that you've got the refined version. I picked up a jar of Al-Arz Whole Sesame Tahini in Israel which was the sweetest tahini I've ever tasted. When I returned home, I was able to track it down at a Jewish market in LA (yes, okay, I emailed the manufacturer to find out if they had US distribution, shhhh). Sadly, I haven't found a single brand of unhulled tahini in the Bay. But the good news is that if you can't find it in your area and don't want to buy it online, you can always make your own. Just make sure you buy raw, unhulled (brown) sesame seeds when you do!

Halva is the New Healthy [Macaroon]

I knew I wanted to create something to share with you all in time for Passover (in case that's your jam) that would also be non-denominationally delicious. Running through the list of traditional dishes in my head, it wasn't too long before lightning struck: halva macaroons! Most of the macaroon recipes I've seen and tested use condensed milk as the primary sweetener and binder, which yes, is delicious, and is also pretty terrible for you. Halva spread (tahini + raw honey, not turned into candy-nougat-treat) is delicious, super nutritious, AND basically the consistency of condensed milk! I felt like I was onto something big, and guess what? It totally worked! 

I made these macaroons on the larger side because I was feeling excited about them and was feeding them to grown adults, not small children (mostly; hi Sadie and Theo!). I invite you to make them whatever size feels right for your crowd, just be mindful to adjust the baking time accordingly. I also drizzled the chocolate because I thought it would look pretty, but I encourage you to dip the tops of the macaroons in it if you want a richer party in your mouth. 

Tahini Honey (Halva) Macaroons
Adapted from Danny Cohen's 'Danny Macaroons' recipe
makes 26 1" cookies

Ingredients
2/3 cup tahini (preferably unhulled) 
1/3 cup raw honey
1 tsp. vanilla extract
14 oz. (4 1/4 cups) unsweetened, shredded coconut
2 large eggs, whites only
1/4 tsp. sea salt
1/4 cup dark chocolate chips
1 tsp. coconut oil
Flaky sea salt (like Maldon), to finish

Method
1. Preheat oven to 350°F. Line a baking sheet with parchment and set aside.
2. In a small saucepan, melt honey over low heat until entirely liqueified.
3. Add tahini and whisk together until the mixture becomes like the consistency of condensed milk, thick but still runny.
4. Whisk in vanilla.
5. In a large bowl, mix together the shredded coconut and salt.
6. Pour the tahini honey mix into the coconut and, using your hands, blend together until the coconut is entirely covered. The consistency will be sticky and crumbly, almost like a crumb cake topping.
6. In a stand mixer with a whisk attachment or with an electric beater/whisk, beat the egg whites until stiff peaks form.
7. Gently fold egg whites into the coconut mixture.
8. Using your hands, form 1"-2" balls with flat bottoms out of the coconut mixture and set on parchment. They can be set close together, as they will not expand when baked.
9. Bake macaroons for 13-18 minutes, depending on size, until the tops and bottoms are golden.
10. Once the macaroons are done baking, remove from oven and set aside. Cool completely on tray.
11. Melt chocolate chips and coconut oil in a double boiler. Drizzle chocolate over macaroons with a fork or, once the macaroons have cooled, dip the tops or bottoms of them into the chocolate. Finish with a pinch of flaky sea salt.
12. Refrigerate for 10 minutes to allow the chocolate to set. 

Macaroons will keep refrigerated for up to a week.

Roasted Cauliflower, Dates & Almonds with Herbed Moroccan Saffron Sauce

It all started with kale: the little leafy green that could. The everyday superfood, the requisite plant that turned your smoothies green, the first (and maybe still only?) vegetable to proudly be printed on t-shirts and tote bags with slogans ("Oh kale yeah!", anyone?). Slowly and then suddenly, it was happening: vegetables were en vogue.

This onslaught of attention towards vegetables has been incredible and inspiring. It seems like one by one, they are each having their moment in the spotlight, being experimented with and touted by restaurants, culinary magazines, and food blogs alike. One of the recent recipients of this star treatment is also one of the least flashy vegetables around and, incidentally, one of my favorites: the humble cauliflower.

Did any of you pick up on the cauliflower 'rice' craze a year or so ago? That was a thing. You finely mince or grate the flowerets until they become suuuuper tiny and then give them a quick sauté for flavor and voilà! It looks and feels like couscous but is actually still cauliflower! Amazing. Seriously. Then there was that moment when everyone seemed to be making cauliflower pizza crust, which I must admit I have not attempted, but can appreciate the ingenuity of. While I love that cauliflower is being transformed and eaten in such creative ways, it first wormed its way into my heart through a much more classic preparation: the simple act of roasting. Tossed with oil and exposed to a shock of high heat, its sugars intensely concentrate and edges crisp. Wholly delectable and wholly itself. 

While roasted cauliflower is indeed delicious on its own, its mild sweet flavor provides an excellent palette for bold spices and sauces. Enter: Herbed Moroccan Saffron Sauce. Oh man. This sauce. Created by my dear friend Briana Ryan, who is a stunning chef and holistic wellness practitioner over at Food By Bri, this sauce literally blew me away the first time I tasted it. Its robust and punchy base, composed of saffron and an insane amount of garlic, is given depth by the addition of warm and smoky spices and tons of fresh herbs. Paired here with toasted almonds for crunch and dates for sweetness, this dish is simple and complex, straightforward enough for a weeknight meal and vibrant enough for a special occasion (truth: it has made an appearance on my Roash Hashanah dinner table for two years and counting). 

Cauliflower: The Little Cruciferous that Could

Cauliflower is a vegetable, so it seems safe to assume that it is at least a little bit good for you. But how good is it, as far as vegetables go?

We often use the color of a food to assess its nutritional value. While white does not typically rank highly on the nutri-o-meter (thanks, potatoes, pasta and cheese!), cauliflower is a stealthily powerful contributor to vibrant health. A member of the cruciferous family (in the good company of broccoli, cabbage, kale, bok choy and brussels sprouts), cauliflower boasts a shocking amount of Vitamin C—73% of our recommended daily value per cup!—and provides a generous amount of fiber. But what is perhaps most exciting about cauliflower is its simultaneous support of three bodily systems that are essential in maintaining baseline health: our detox system; antioxidant system; and inflammatory/anti-inflammatory system.

When any one of these systems is out of balance (which can result from a variety of factors including insufficient nutrition, lack of sleep, stress, exposure to external toxins, etc.), our bodies become susceptible to illness and disease. The chronic and synchronized imbalance of these three systems creates the perfect storm for cancer development. Lucky for us, we can regularly influence their health through the simple and joyful act of eating good food! As cauliflower contributes to the optimal functioning of all of these systems, current research has identified it as a vegetable that directly supports cancer prevention.

Without getting overly technical, let's break this down to develop a little deeper understanding of how this all works. Our detox system is composed of two phases: Phase One, in which the liver uses oxygen and enzymes to burn toxins and render them water soluble; and Phase Two, in which the oxidized toxins are combined with sulfur and amino acids and eliminated from our bodies. Cauliflower contains antioxidants that assist in the Phase One detoxification process as well as sulfur-containing nutrients that boost Phase Two detoxification. Our bodies' antioxidant system, which combats free radicals, is supported by cauliflower's generous amounts of vitamin C and manganese in addition to its wealth of phytonutrients. In the final piece of this triad, cauliflower battles inflammation in the body through its many anti-inflammatory nutrients, including vitamin K, which directly regulates our inflammatory response.* 

I don't know about you, but I was sure surprised to learn that such an unassuming vegetable packs this healthful of a punch. In treating our bodies with loving kindness, it is important to nourish them with these kinds of foods; equally important is preparing these foods in ways that  stimulate our taste buds and generate a joyful eating experience. This dish has brought me all kinds of joy, made and shared over the past couple years with many different people I love. May it do the same for you!


*Nutritional information gathered from World's Healthiest Foods; The Leaf Lady; Mercola

Roasted Cauliflower, Dates & Almonds with Herbed Moroccan Saffron Sauce
Serves four as a side

Ingredients

1 cauliflower (large)
1 Tbsp. coconut oil, melted
1/2 cup raw almonds
6 Medjool dates (pits in & relatively firm)

Herbed Moroccan Saffron Sauce* from Food By Bri
6 cloves garlic
1 1/2 tsp. kosher salt
2 pinches saffron
2 lemons, juice & zest (preferably Meyer, but regular are A-OK too)
2 tsp. smoked paprika
2 tsp. sweet paprika
2 tsp. coriander
1/4 cup flat leaf parsley, minced
1/4 cup cilantro, minced
1/2 cup good quality, cold pressed olive oil

Method
1. Pre-heat oven to 325°F. Spread almonds on a baking sheet and toast until fragrant, 10-12 minutes, tossing halfway through.
2. While the almonds are roasting, break down the cauliflower into medium sized flowerets, leaving the stems intact. Toss with coconut oil and season with salt and pepper.
3. Once the almonds are toasted, remove them from the oven and turn the oven up to 400°F. Roughly chop the almonds and set aside.
4. Spread the cauliflower out on the baking tray, making sure none of the pieces overlap. When the oven has reached 400°F, roast the cauliflower until nicely browned, about 30 minutes, tossing a couple times in between.
5. While the cauliflower is roasting, take the pits out of the dates and chop the dates into 1/4" pieces. Set aside (with almonds is fine).
6. Assemble the sauce: Mince garlic, kosher salt and saffron together until it forms a paste. (Be persistent and patient, this can take awhile.) Combine the paste in a jar with the rest of the prepared sauce ingredients and shake vigorously until emulsified.
7.  Once the cauliflower is ready, gently toss it with the dates and almonds. If you're serving a crowd, pour about 1/3 of the sauce onto the dish and toss it all together, tasting it and adding more if you'd like. If you're plating the dish, drizzle the sauce over the cauliflower on each individual plate (it looks nicer this way).


*These quantities make way more sauce than you need for this dish, but I find it's great to have on hand to use throughout the week. I recommend tossing the leftover sauce with grains; spreading it on toast topped with a fried egg; and/or using it as a base for homemade pizza with roasted red pepper, olives and feta. Just some suggestions of things I've tested out that are pretty damn delicious—but get creative!

Roasted Pear & Ginger Skillet Crumble

I have a confession to make: I have a massive sweet tooth. I stare, aghast and confused, at people who say they don't like chocolate; will happily drive from the East Bay to SF just to get a Tartine morning bun; and eat potentially dangerous amounts of cookie dough straight from the bowl. Ironically, I am also a mild health nut. I vigilantly read the ingredients on every packaged item I buy; love seeing a spectrum of radiant hues on my plate; and am well educated on the horrors that refined sugar inflicts on our bodies. As you may imagine, it is oftentimes difficult to reconcile these two things. 

I began slowly. When baking, I swapped out portions white flour for whole wheat or spelt in recipes. Used molasses-rich, unrefined muscovado instead of brown sugar; a bit of apple sauce instead of oil. And then I discovered dates: nature's carmel. The one incredible whole food, chock full of fiber and nutrients, that could conceivably pass as candy, could serve as the binder in raw truffles and sweeten oatmeal so well that sugar or maple syrup became superfluous. My palate and cravings shifted and I began to savor the creativity in experimenting with making decadent treats that would also make my body feel good. Full disclosure: this crumble is one of those treats.

Arguably the best thing about this dessert is that it is free of refined sugar, gluten and dairy, yet no one who eats it would ever know. It is a wonderful dessert for these chilly winter months when you're still craving something sweet, warm and comforting while trying to take a break from the indulgence that the holidays inevitably bring. Plus it's perfect for your vegan and gluten-free friends! Everybody wins.

While traditional crumbles build their topping from butter, white flour and refined sugar, this version uses a variety of nuts, spices, and muscovado sugar to create its crunchy, crumbly crust. The nuts provide our bodies with protein, vitamins, minerals and heart-healthy mono-unsaturated fats, which help lower LDL (the "bad") cholesterol levels and increase HDL (the "good") cholesterol in our blood. Muscovado, while certainly still sugar, is an unrefined variety that retains much of the nutritional value of the molasses (which is super high in iron!) that gives it its distinct, rich flavor. I was surprised when I first learned that brown sugar is subjected to the same refinement process and chemical treatment as conventional white sugar—it just has the molasses is added back in after—but c'est vrai

Truth be told, pears were never a fruit that particularly wowed me until I was subjected to the bleak yield of winter produce while living in the UK. In those dark months, they were a most welcome respite from the unending root vegetables and hardy winter greens that filled my local farmers' market stalls. Maybe it was the desperation, but I swear those pears were more succulent than any I had ever tasted. They completely won me over and created the spark for this roasted winter crumble. It's adapted from a recipe by the ever-inspiring Sarah B. of My New Roots, who created hers in the summertime using raw peaches. That's part of what I love about it though: the formula. Swap the peaches for pears in the winter, or figs in the summertime, apples in the fall, apricots in the spring. You really can't go wrong.

Roasted Pear & Ginger Skillet Crumble
Adapted from My New Roots' Peachy Keen Raw Cobbler

Ingredients
Filling
10 pears (I used D'Anjou, but Bartlett, Bosc and Comice would work well too)
1 Tbsp. coconut oil, melted
1 tsp. cinnamon
1/2 lemon, juice & zest
2" piece ginger root, grated
5 Medjool dates, pitted
1 tsp. vanilla extract

Topping
1/2 cup raw brazil nuts
1/2 cup raw walnuts
1 cup raw pecans
1/4 cup muscovado sugar
1 tsp. cinnamon
1/2 tsp. ground ginger
1/4 tsp. sea salt

Method
1. Preheat oven to 350°F/177°C. Cut pears into 1/2" cubes.
2. In a roasting pan, toss pears with coconut oil and cinnamon. Roast until soft, about 30 minutes, mixing halfway though.
3. Meanwhile, pulse all topping ingredients in a food processor until roughly crumbly (not nearly as fine as sand). Pour out and set aside.
4. Once pears have roasted, put 1 cup of of the pears in the food processor along with the lemon juice and zest, grated ginger root, dates and vanilla extract. Blend until it is completely puréed. 
5. Place the remaining roasted pears In a well oiled cast iron skillet (or a pie or cake pan if you don't have one). Pour the filling purée over the pears and gently mix them together. Smooth the filling flat and sprinkle the nut crumble evenly on top.
6. Return to oven and cook until nuts are toasty, 10-12 minutes.
7. Enjoy warm. Top off with ice cream if desired!