Rosemary Honey Cashew Butter | An Ode to Homemade, Edible Gifts

RosemaryCashew1
CashewButter2

For a brief yet impressing moment in time, I thought about starting a nut butter company. That was certainly one of the biggest curve balls of my life to date: coming out of a year devoted to completing my Masters in Contemporary Art Theory with a desire to become a fancy flavored nut butter entrepreneur.

It made as much sense to me – in context of my life at the time – as it was absolutely crazy. The part that made sense was this: Making nut butter from scratch was one of the most magical endeavors I undertook that year, during which I not only achieved my MA but also taught myself how to cook. Witnessing the nuts transform from solid to liquid astounded me, their natural oils releasing and completely altering their physical composition due to nothing more than an aggressively spinning blade. (Clearly I had no idea how much oil nuts contain.) What's more, it felt empowering. This food product that I had understood comes from a jar at the supermarket much the way an apple comes from the branch of an apple tree, I could make at home?! This meant I could not only control the quality of the nut butter but also the additional ingredients that defined it. The opportunities for creative deliciousness were endless! Maple cinnamon almond butter! Chai spice pecan butter! Or even something sweet and herbal, like...rosemary honey cashew butter.  

The part that was absolutely crazy about my nut butter entrepreneur pipe dream was, well, everything else.

Cashews
Rosemary
Honey

All of the holiday gifts I gave that year were food related. Educational. Homemade. I wrote out instructions for my parents (on graph paper with a wealth of colored pens) on how to make my favorite Oilve Oil and Maple Granola – customizable and refined sugar-free! – along with a "voucher" for a lesson where we would make it together. I made variety after variety of nut butter, some based on my preferences and some based on theirs. The gifts may have taken a bit more time than purchasing things online, but I could tell that they were deeply appreciated and meaningful. Unique. Imbued with creativity and care. 

The other great thing about gifting nut butter is that, if you are looking to give small gifts to many people, you can make a big batch with no more effort than making a small batch! Just saying.

While my dream of bringing inspired nut butters to foodies everywhere eventually fell by the wayside, I would be remiss to not mention that when I gave my former housemate a taste of this Rosemary Honey Cashew Butter the first time I made it, she literally freaked out and insisted that I start selling it at farmers markets immediately.  Even if you're skeptical and rosemary is not typically your thing, I encourage you to approach this one with an open mind. You may just find yourself surprised.

I hope everyone has a joyful and delicious holiday season – one that is nourishing in every sense of the word. Take time for yourself when you need it. Relish the sweets and listen to your body so you know when you should maybe ease up a little (that's, erm, some advice to myself that I thought maybe some of you may also relate to). Stretch in the mornings. Return to your breath in stressful times. Sink into the beauty of the season, in actions, words and things. Take good care. 

Blitz1
Blitz2
Blitz3
Blitz4
CashewButter4

Rosemary-Honey Cashew Butter
Makes about 1 cup.  Scale up for a larger batch.
Originally published on my 2012 blog, which I am not linking to because looking at it is like looking at your old yearbook photos, but which I am mentioning because, citations. 

Ingredients
2 cups raw cashews
2 tsp. fresh rosemary
2 tsp. raw honey
1/2 tsp. fine sea salt or pink Himalayan salt
1 tsp. cold-pressed sunflower oil, optional (for more runny cashew butter; it is quite thick otherwise)

Directions
1.  Preheat oven to 300°F.
2.  Spread cashews on a baking sheet and roast for 15-20 minutes, until fragrant. Stir a few times during roasting.
3.  Let cool for 5 minutes.
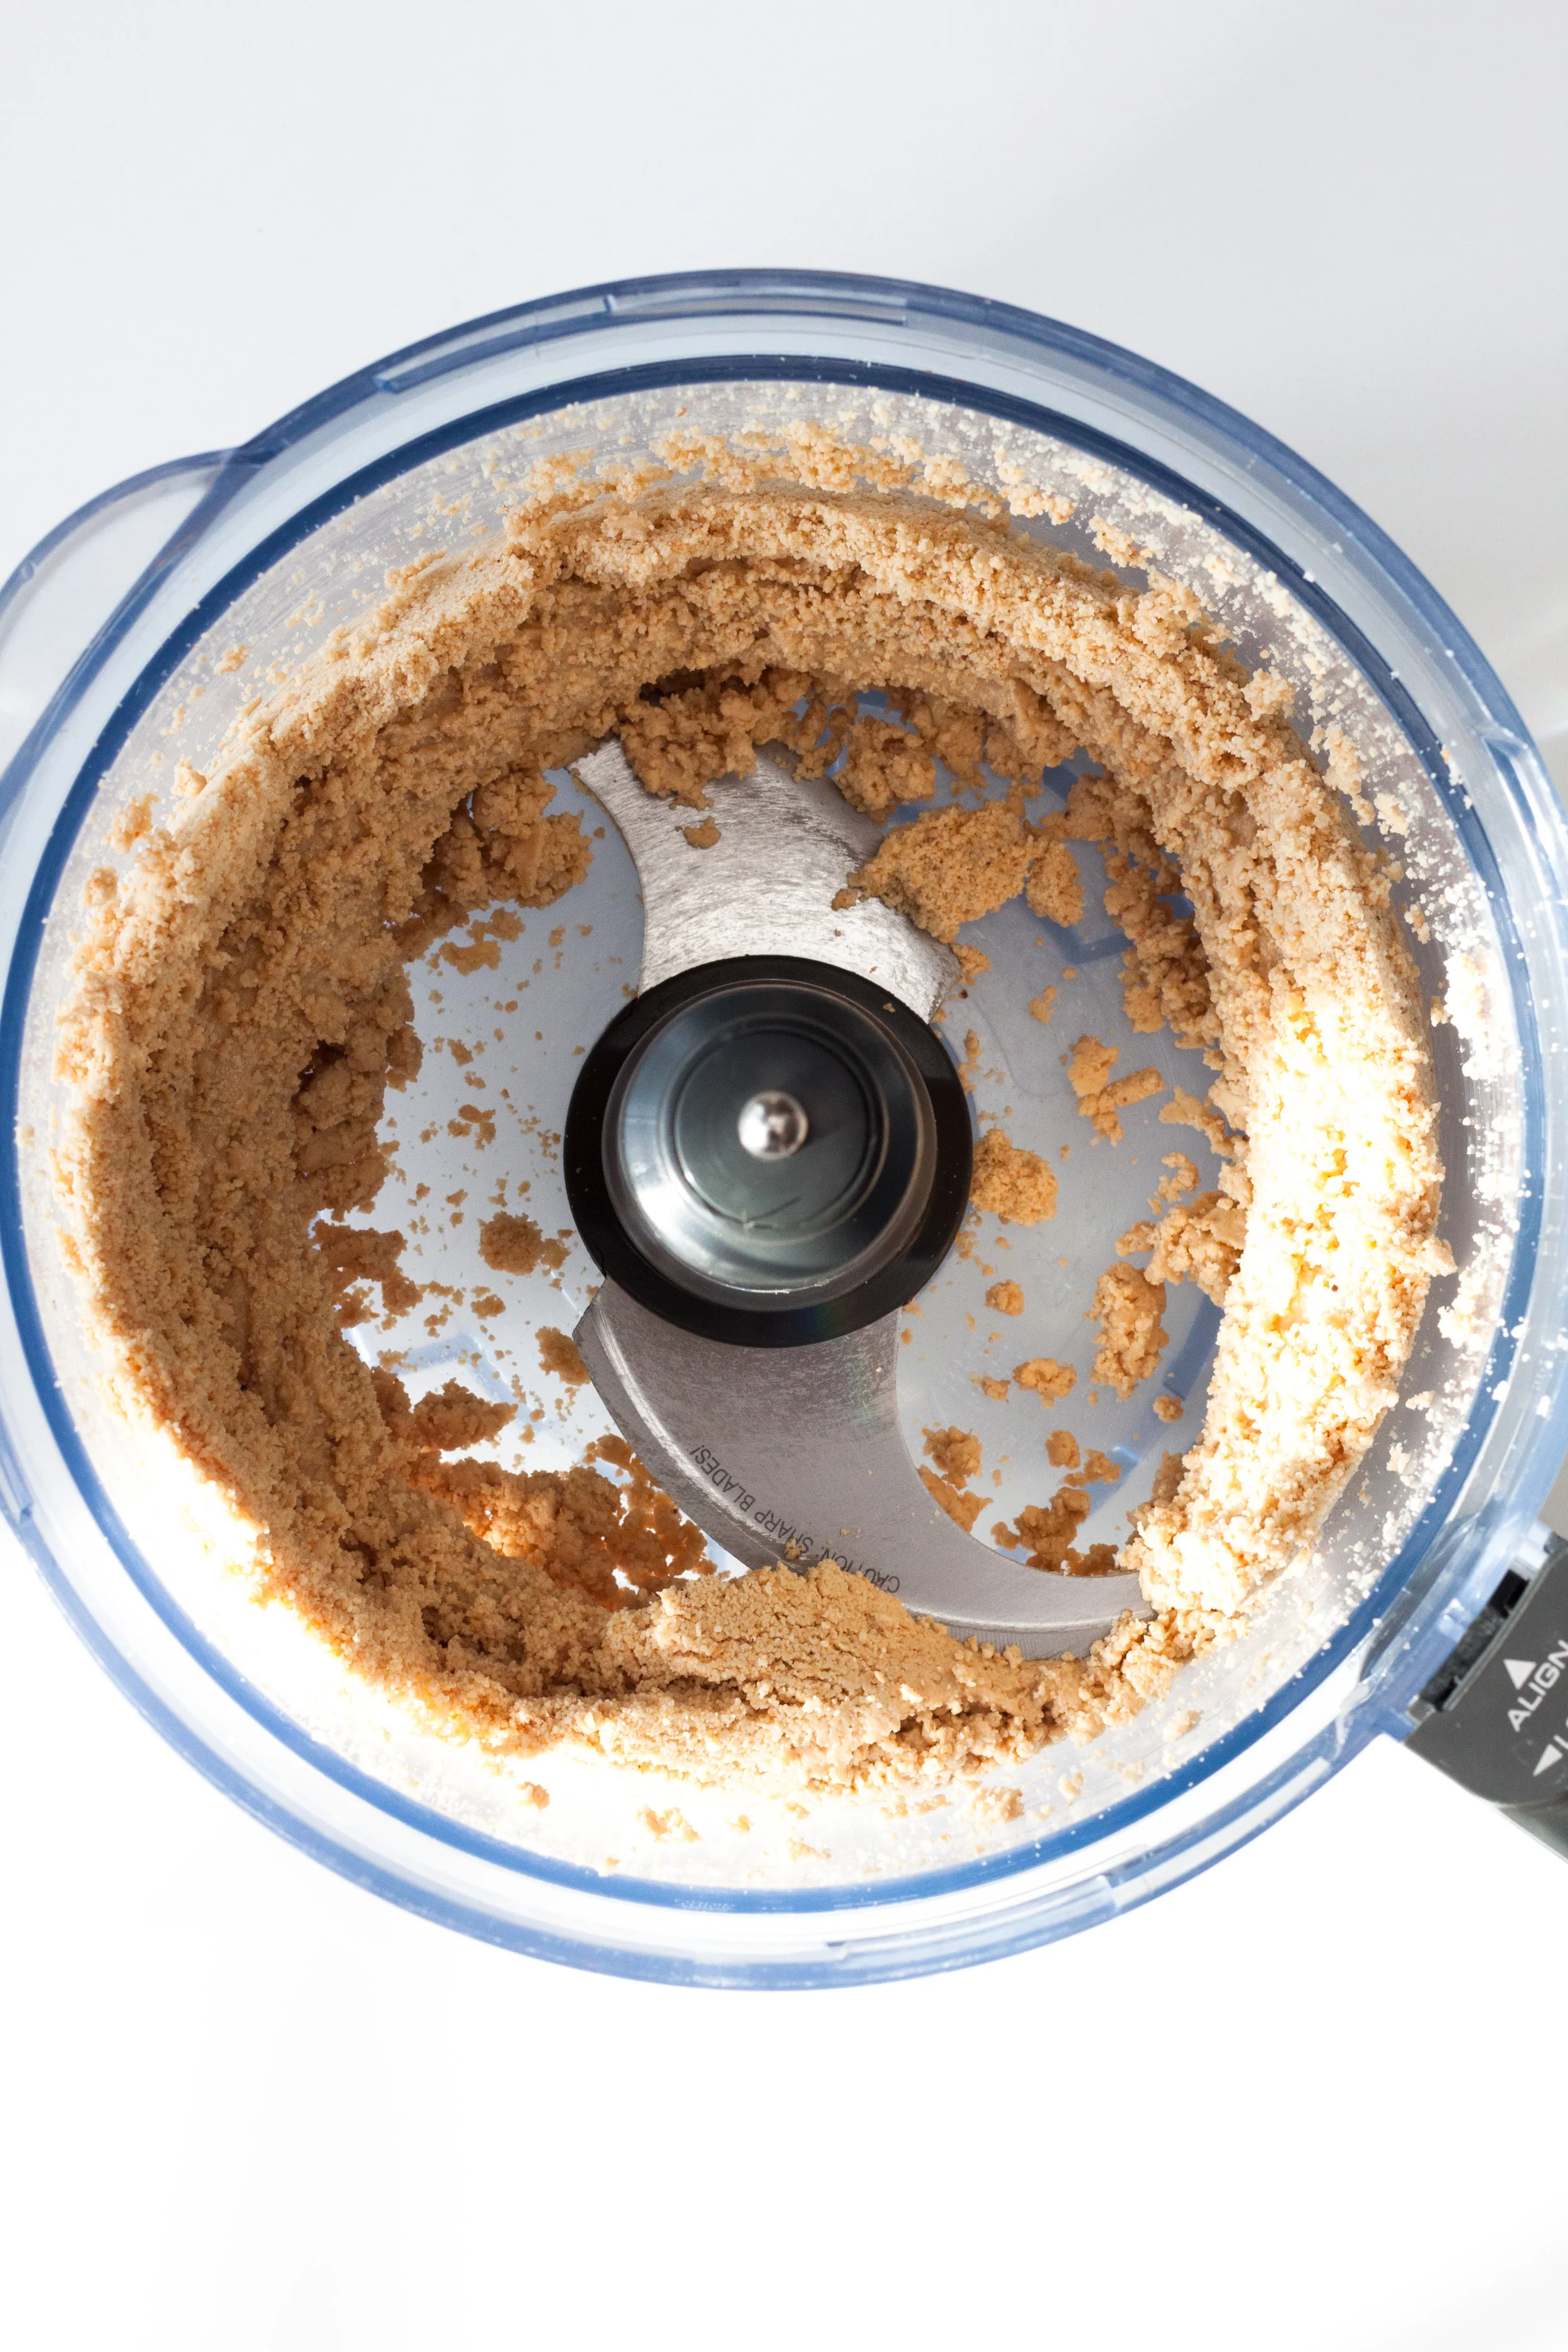
4.  Place cashews in food processor fitted with an S-blade and blend until the nuts turn into a smooth 'butter'. This could take anywhere from 5-15 minutes. Scrape down the sides of the bowl as needed.
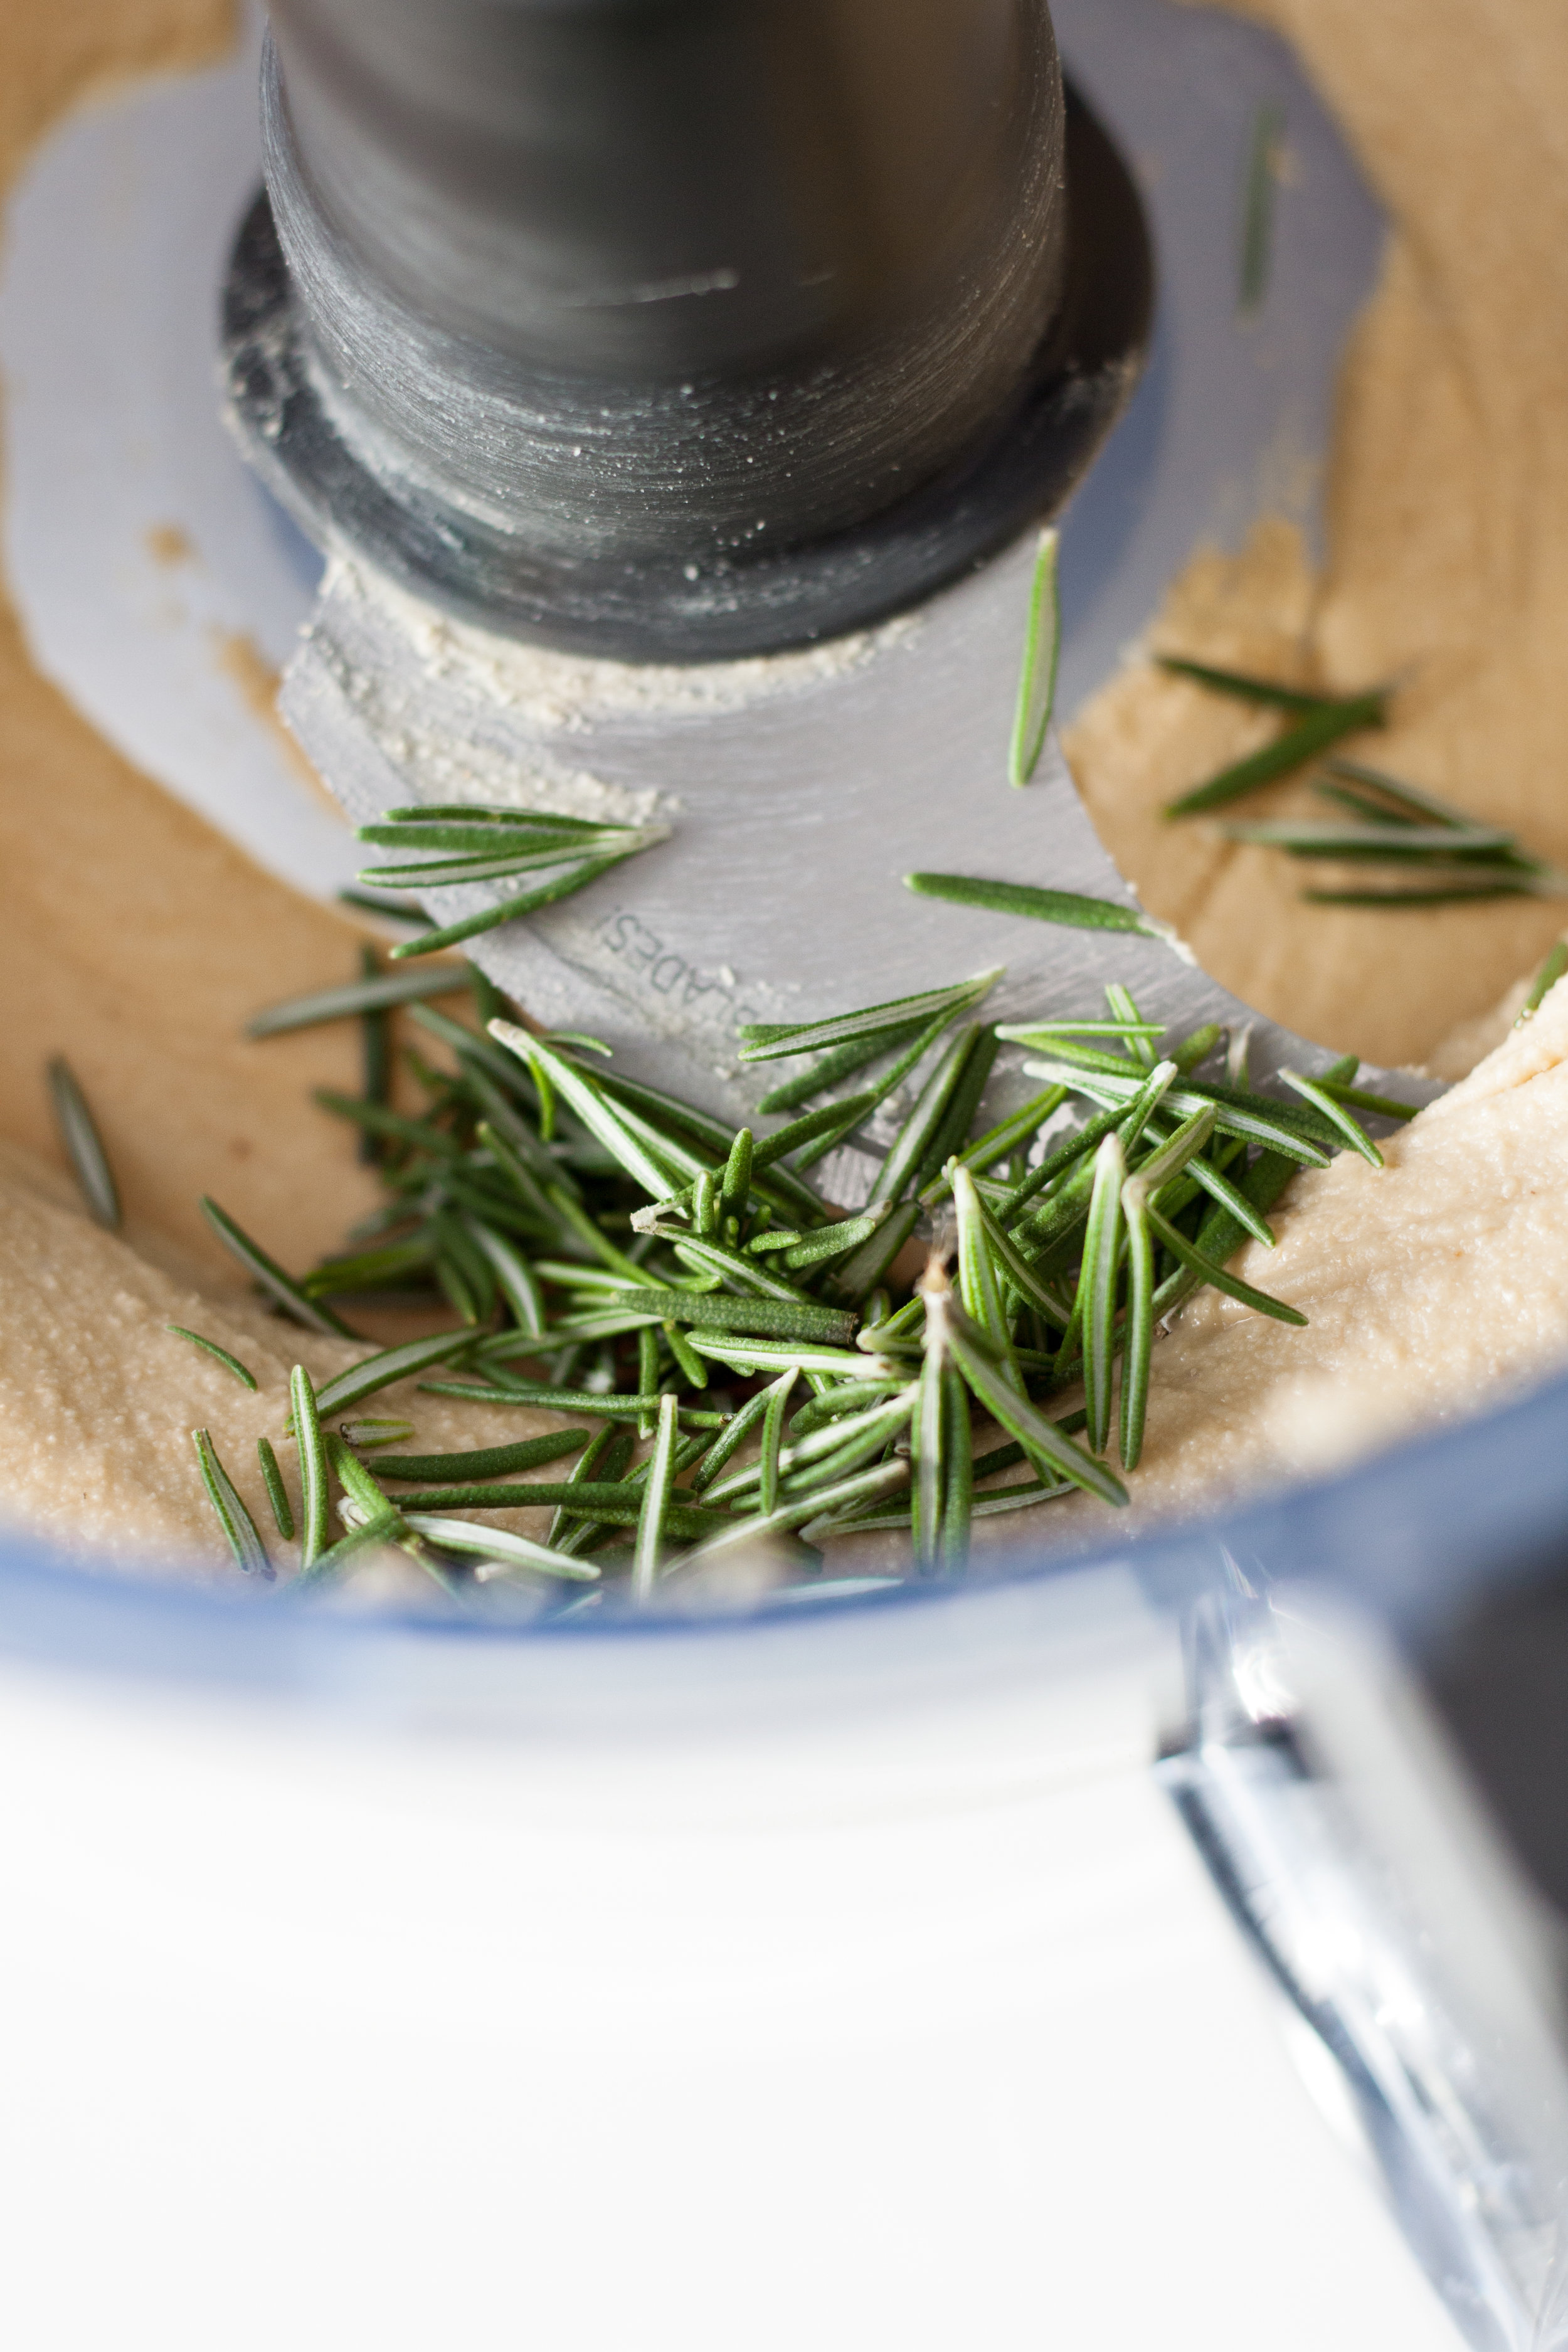
5.  Add rosemary and salt and process for another minute or two.
6.  In a small saucepan, melt honey over low heat until it is completely liquefied – much thinner than its syrupy state. Add to nut butter and process for another minute until fully combined. The nut butter will clump up again; keep the blade running until it returns to its smooth state.
7.  If you prefer your cashew butter even creamier, add the 1 tsp. of a sunflower oil.
8.  Carefully remove blade from food processor. Transfer nut butter to a glass jar with a lid and store in the fridge.

Black Sesame Tahini Banana Bread

IMG_5850.jpg
IMG_5734.jpg
IMG_5768.jpg
IMG_5784.jpg
mis3.jpg

Banana bread is an American staple. A big time comfort food. Un-fussy, un-pretentious and utterly delicious. But also, it’s basically cake.

This banana bread is not basically cake. It’s whole grain, higher in protein than usual (thanks almond flour! thanks tahini!), and has an incredible crumb and depth of flavor from the tahini…which I’m beginning to be convinced should be added to every baked good ever.

I feel very passionately about tahini. Don’t love it? It’s probably because you’re buying tahini that is mechanically ground, which most tahini is these days. This results in a bitter taste—which is not tahini’s inevitable fate! I encourage you to seek out stone ground tahini, which is the traditional processing method. This results in a suuuuper delicious, not at all bitter, eat it straight from the jar tahini. You’ll also want to make sure to get whole sesame (dark) tahini rather than hulled (light) tahini. This is also harder to find, but well worth the search, as it contains much higher nutrient values than tahini made from sesame seeds that have had the hull—the outer shell—removed. THIS IS MY FAVORITE BRAND. (Sorry, emphatic.) If you’re curious to learn more about tahini processing and nutritional values, check out my post here.

I made and photographed this tahini banana bread over Labor Day and took it to two potlucks that weekend…where multiple people from each gathering asked me for the recipe. Just saying. In case you needed any more convincing. :D

IMG_5829.jpg
IMG_5643.jpg

Black Sesame Tahini Banana Bread
Makes one 9"x5" loaf or two mini loaves
Adapted from A Cozy Kitchen

Ingredients
1 cup white whole wheat flour (or spelt or regular whole wheat if you can't find the white varietal)
1/4 cup almond meal
1/4 cup buckwheat flour
2 Tbsp. black sesame seeds (or brown), plus more for sprinkling
3/4 tsp. sea salt
1 tsp. baking soda
1/3 cup coconut oil, melted
1/4 cup muscovado sugar (unrefined brown sugar)
1/4 cup raw cane sugar
1 egg
1 tsp. vanilla extract
3 Tbsp. tahini
4 ripe bananas, 3 mashed & 1 sliced lengthwise

Directions
1. Preheat oven to 350°F. Grease and line a loaf pan with parchment. Set aside.
2. Mix flours, sesame seeds, salt and baking soda in a bowl. Set aside.
3. In a separate medium bowl, mix coconut oil and sugars together until the sugar begins to dissolve. Whisk in egg and vanilla extract until mixture is smooth and thickened.
4. Add tahini and the mashed bananas to the wet ingredients. Stir until thoroughly incorporated.
5. Pour the dry ingredients into the wet. Gently stir together until just combined (it's okay if the batter is a bit lumpy).
6. Pour batter into prepared loaf pan. Sprinkle additional sesame seeds on top, then place the two long slices of banana on top, cut side face up. Push them down into the batter so they settle a bit.
7. Set pan on baking sheet (it's easier to pull out of the oven this way). Bake until a toothpick inserted in the center comes out clean, about an hour.

Lemony Fava Bean Tartine

IMG_4108.jpg

This is a super simple celebration of spring. As the bounties of the season begin to pour in, we are blessed with vibrant and delicious produce that often requires little to no cooking. I also love the revelations that come with tasting fresh foods straight from the pod or the cob that you might eat from frozen at other times during the year; there is no comparison! Fava beans are less common in the standard American diet than, say, peas, which is a shame because they are suuuuper delicious. They also happen to be crazy nutrient dense, containing an array of vitamins (folate, thiamine, vitamin K, vitamin B6) and minerals (iron, manganese, potassium, copper, zinc, magnesium) in addition to fiber and protein! 

I used dill and tarragon in this recipe because I seem to perpetually have leftovers of those herbs in my fridge as of late. This would also be delicious with mint, basil, chives, chervil, parsley, or some combination thereof. You can have it on toast or off; with an egg or without. The basic equation here is fava beans + herbs + lemon = yum. It's pretty much that simple.

Lemony Fava Bean Tartine
Makes two toasts

Ingredients
1 1/2 cup fava beans (from about 1 lb. favas-in-the-pod)
1 unwaxed, organic lemon, zested
1 1/2 Tbsp. fresh squeezed lemon juice
3 Tbsp. cold-pressed, good quality olive oil
1/8 tsp. pink or sea salt
2 handfuls pea shoots
1 Tbsp. dill fronds, fresh
1 Tbsp. tarragon leaves, fresh
Two slices whole grain or country sourdough
Soft boiled egg (or cooked to preference)
Fresh ground pepper, to finish

Directions
1. Bring a medium pot of water to a boil. Fill a medium bowl with ice water and set aside. Cook fava beans in the boiling water for 1 minute, then strain and transfer to the ice water. Peel the waxy outer coating from the fava beans.
2. In a medium sized jar with a lid, shake together the lemon zest, lemon juice, olive oil and salt. Add the fava beans to the jar and gently shake to coat.
3. Toast your bread — a toaster is great but a grill pan with some olive oil would be extra delicious.
4. Place one big handful of pea shoots on each toast slice. Pour the favas and their oil on top of the greens (you may have a bit of oil leftover; it makes great salad dressing!). Sprinkle 1/2 Tbsp. of each herb onto each slice. Top with an egg if desired and a few twists of freshly cracked black pepper. Enjoy!

Sweet or Savory Ancient Grain Porridge (with Dates, Pear & Pomegranate)

This porridge is inspired by a divine, 5 grain porridge at a local cafe called Bartavelle. I love its robust texture and heartiness and have been attempting to sufficiently replicate it at home for the past two years. In addition to being super satiating because it is made of whole grains and seeds, which are packed with protein, fiber and healthy fats, it is also GLUTEN-FREE! Horray.

To simplify things, I've scaled the porridge down to four "grains": Quinoa, amaranth, flax and brown rice. Most of these are actually seeds, but "Sweet or Savory Seed Porridge" sounded kind of like a thing for birds...so we'll go with the common misconceptions. Quinoa is one such seed that is generally acknowledged as a grain. It is also one of the few plants that contains all 9 essential amino acids that make a complete protein. Similarly, Amaranth is a tiny seed that behaves like a grain and was a staple food of the Aztecs. It has a toasty flavor, is also a complete protein, and is rich in iron, calcium and vitamin C. Flax seeds are revered for their high omega-3 content, which is a type of essential fatty acid that is necessary for healthy functioning and can only be obtained through the foods we eat. Flax is also a great source of fiber, antioxidants and minerals including manganese and magnesium. Brown rice is delicious. And, unlike white rice, contains a hefty amount of fiber to help keep our guts and hearts healthy!

Eaten straight with no salt, this porridge is incredibly savory. When you add salt it's still savory, but tastes a lot better. I love adding a generous teaspoonful or two of melted ghee to the porridge regardless of my toppings, as its rich toasty flavor balances out the earthiness of the "grains" super well. If you don't have ghee, you can use browned or melted butter. From there, the toppings are up to you!

Sweet or Savory Ancient Grain Porridge (with Dates, Pear & Pomegranate) 
Serves two

Ingredients
Porridge
2 1/2 Tbsp. short grain brown rice
2 1/2 Tbsp. quinoa, any color
2 Tbsp. amaranth
1 Tbsp. flax seeds
generous pinch or two sea salt

Sweet
Ghee
Chopped dates
Pure maple syrup
+ Seasonal fruit toppings
Pear slices
Pomegranate seeds

Savory
Ghee or cold-pressed oilve oil
Soft boiled egg
Flaky or herbed salt
Gomasio
+ Seasonal veg toppings, if desired
Sauteéd mushrooms
Caramelized onions
Sauteéd kale

Directions
1. If you can have the foresight, soak the quinoa, brown rice and amaranth overnight (but not the flax) in filtered water with a splash of lemon or apple cider vinegar. In the morning, strain and rinse well.
2. If you weren't able to soak the grains overnight, the porridge will still work! It just won't be activated. Place the grains in a fine mesh strainer and rinse, rubbing them together with your hands to clean thoroughly. 
3. Place the rinsed grains in a small pot, add the flax and 1 cup of water. With the pot covered, bring to a boil, reduce to a simmer, and let cook undisturbed for 25 minutes.
4. Turn off the heat and let the porridge sit, still covered, for 10 minutes.
5. Add salt to taste. Finish off with sweet or savory toppings and enjoy!

Bright Beet Hummus with Bee Pollen, Hemp Seeds and Fleur de Sel

I made some hummus. And I put beets in it because who doesn't want to eat food that is beautifully and naturally bright pink?! Also, some may argue that it makes the hummus extra delicious (and undeniably extra nutritious). I originally assembled this hummus for its glamour shots in a bowl with some minced parsley, swirls of olive oil, and the company of crackers and crudités, while snacking on some leftover brioche that I had in the freezer from an earlier project (because photographing food whilst hungry is dangerous business and I do not recommend it to anyone). The styling and shots were mediocre at best. As I glanced over at the leftover toast, the synapses in my brain fused together its playful shape and pallid palette with the fuchsia hue of the hummus, imagining the eye candy taken even further by the addition of bright yellow pellets of bee pollen and greenish white hemp seeds. Suddenly my party appetizer dip turned into a breakfast toast that was visually suggestive of white cake with pink frosting and sprinkles! 

Sometimes it's good to shake things up a bit. Trust your intuition. Sneak vegetables into your breakfast. Make your food look like a party because it engages your creativity, it's a simple pleasure, it makes life more fun. If you don't have bee pollen or hemp seeds, don't sweat it. Sprinkle some other things that you do have onto this toast and see how they taste. Or stick with the classics and eat the hummus with crackers, cucumber sticks, pita, whatever. Either way, you'll still be eating a food that is delicious, super nutritious and bright freakin' pink, so at the very least you can marvel at that!

Bright Beet Hummus with Bee Pollen, Hemp Seeds & Fleur de Sel
Serves 6-8 as a starter, or enough for many mornings of toast

Ingredients
Hummus
1 1/2 cups cooked chickpeas (from about 3/4 cups dried chickpeas, cooked following this method)
2 medium beets
2 cloves garlic, minced
1/2 cup tahini, preferably unhulled
1/4 cup lemon juice, fresh squeezed (from about 1 large lemon)
1/2 tsp. sea salt
6 Tbsp. ice water

Toppings (get creative!)
Bee pollen
Hemp seeds
Fleur de sel, Maldon or other finishing salt
Parsley
Mint
Toasted walnuts

Directions
1. Preheat oven to 400°F. Chop stems off beets, scrub thoroughly and wrap beets in tin foil. Place on a baking sheet and roast until they are tender and can easily be pierced with a fork, 45-60 minutes. Carefully flip beet parcel over halfway through the roasting to make sure the bottoms don't burn. Once they're tender, remove from oven, unwrap foil and set aside to cool. (You can do this step a couple days in advance.)
2. Place cooked chickpeas in a food processor (if you're using canned ones, make sure you rinse them off first!) and blitz until they become a stiff paste. You may need to start and stop it a few times to scrape down the sides with a spatula until the desired consistency is reached.
3. Once the beets are cool enough to handle, use your thumbs to push/slide off the skins. Chop them into medium sized cubes.
4. Add beets to food processor and blend until thoroughly combined with the chickpeas.
5. Add tahini, lemon, garlic and salt and blend until combined, stopping to scrape down the sides when necessary.
6. With the motor running, slowly stream in the ice water, 1 Tbsp. at a time, stopping after 4 Tbsp. Let the food processor run for about 5 minutes, until the hummus is super smooth and creamy. Taste and assess the consistency and flavor. If you'd like it thinner, add more ice water. Add more salt, lemon and garlic to your taste preference and blend until smooth.
7. Garnish with whatever fits your fancy and enjoy!

Multigrain Waffles, Roasted Strawberries & Raw Chocolate Olive Oil Sauce

Well hello, October! Where in goddess' name did you sneak up on us from? We've suddenly tipped onto the other side of the equinox and are ping ponging between days that still burn with summer heat and days marked by a crisp, penetrating chill. Two weeks ago, I made these waffles with roasted strawberries. This weekend, I baked a winter squash. Typical, California.

I've been sick for the past two weeks, which I attribute to my body being unable to cope with the clunky and indecisive seasonal transition we've got going on here. If any of you more seasonally attuned people are surprised/confused about why this recipe that I'm sharing on Oct 4 has strawberries in it, you are definitely onto something. I would be confused too. When I made it two weeks ago, the "farewell to summer" recipe still felt passable. Then I got sick and unusually busy and my brain couldn't find any words to put onto this digital paper.  

That doesn't mean I haven't been thinking about it though. I've considered many topics for this post: the autumn equinox (did you know that Uranus takes 84 years to travel around the sun and that its axis is tipped at almost 90 degrees, which means that its seasons only include summer and winter and each last 42 years?!); September 30th's black moon (the second new moon in one month, thought to be a potent time for releasing negative patterns and setting new intentions); and Rosh Hashanah, the Jewish new year (happy 5777 y'all!), a time of celebration that leads into a week of deep personal  reflection on one's actions in the past year. 

The truth is though, I still don't have the brain power for any of that. I was just talking to my housemate about this dilemma. She told me (in fewer words but with more gesticulation) that her experience of this whole waffles with roasted strawberries and raw chocolate sauce situation was one of sheer joy, of leisurely cooking (okay, watching me cook) on a Saturday morning while playing with light and my new camera (!!!), climbing on stools to get better shots while savoring the smell of maple oozing from the oven, catching each other up on the events and drama from our lives and sitting down to an insanely delicious brunch all together as the family we've become. She asked me to summarize the theme of my blog. After articulating it as best I could, she suggested that I practice some of the self-compassion that I promote in this space and not stress about it so much. Not force myself to write what I feel like I "should" because of the purview of the content that I've constructed. So I've decided to take her up on that. Better to just get it out in the world before the frost sets in and strawberries disappear completely, right?

I will say a few words about this recipe though. The waffles come by way of Sprouted Kitchen and are ridiculously delicious. When I first started getting into subbing whole grains for white flour in basically every single baked thing I made, I was constantly frustrated by not being able to make pancakes or waffles with whole grain flours that tasted good. This recipe proves that it absolutely can be done. It's a little involved and has more ingredients than a standard from-scratch waffle, but it's entirely worth the effort. In addition to tasting amazing, the waffles are packed with satiating and nourishing protein from almond flour, fiber from whole wheat flour, healthy fats from flax and Greek yogurt, and have very little sugar. How often can you say that about a carb-loaded breakfast?!

I roasted strawberries for the first time a few days before making these waffles and was completely blown away by how jammy and delectable they tasted. They immediately became my new favorite condiment. I wanted to put them on everything. So I used them as an excuse to make and post my favorite waffles...and to eat chocolate for breakfast.

As for this raw chocolate sauce, well, it is the icing on this breakfast cake. Is it strictly necessary? No. Will you want to pour it all over your waffle to swirl amongst the jammy strawberries and then eat any that's leftover shamelessly with a spoon and lick the container afterwards? Yes. The sauce is the brainchild of Sarah B. of My New Roots and comes from her gorgeous first cookbook. She put it in the dessert section with some poached pears, but knowing how much I love sweets I'm sure she will not be surprised to find me blatantly encouraging you to incorporate it into your breakfast. (Needless to say, you can put the strawberries and chocolate sauce on your ice cream later, too.)

While you could make the chocolate sauce with unsweetened cocoa powder, I strongly encourage you to buy a small bag of raw cacao powder to use in this recipe if you don't own any already. The nutritional difference is HUGE. As in, there is little to no nutritional value in processed cocoa powder, while raw cacao powder is ground without heat and consequently retains all of its magical potent miracle qualities. If my brain were working better I would do some research and explain said qualities to you, but since it isn't, I will simply direct you to Sarah B.'s highly informative and entertaining explanation, which you can find here.

I think that's about all I've got in me for now. Tune in next time for more grounding, uplifting, meditative words on life, our world and our spirits. In the meantime, go make some badass healthy waffles.

Multigrain Waffles, Roasted Strawberries & Raw Chocolate Olive Oil Sauce
Serves 4


Ingredients
Multigrain Wafflesslightly adapted from Sprouted Kitchen
1 egg, room temperature
1/2 cup full fat plain yogurt
1 cup milk (plant or whole cow's, preferably organic)
2 Tbsp. orange juice, fresh squeezed
1 tsp. vanilla extract
3 Tbsp. melted coconut oil or ghee
2 Tbsp. flaxmeal
1/2 cup almond meal
1/2 cup + 1 Tbsp whole wheat flour
1/2 cup oat flour (make this by blitzing oats in a blender!)
1 Tbsp. muscovado or coconut sugar
1/2 tsp. cinnamon
2 tsp. baking powder
1/2 tsp. sea salt

Roasted Strawberries
16 oz strawberries, hulled and cut into halves from top to bottom
1 Tbsp. cold-pressed olive oil
1 1/2 Tbsp. real maple syrup
1/8 tsp. sea salt

Raw Chocolate Olive Oil Sauce, slightly adapted from My New Roots: Inspired Plant Based Recipes for Every Season by Sarah Britton
3 Tbsp. cold-pressed olive oil, preferably with a sweet/mild flavor
2 Tbsp. pure maple syrup
pinch of fine sea salt
3 Tbsp. raw cacao powder

Directions
Multigrain Waffles
1. In a large bowl, mix all of the wet ingredients (egg through melted oil) together.
2. In a separate bowl, mix the remaining ingredients together.
3. Whisk the dry ingredients into the wet ones. Let sit for a few minutes while you heat up your waffle iron. If you'll be waiting to eat once they've all been cooked, pre-heat your oven to 200 degrees.
4. Pour enough batter into the iron to fill it without overflowing it (I tend to err on the conservative side). The waffle will be done when the machine stops steaming.
5. Place each waffle on a baking sheet in the oven to stay crisp if you aren't eating immediately.

Roasted Strawberries 
(It's best to get these started and in the oven first, so they're baking while you're mixing your waffle batter)
1. Pre-heat oven to 350 degrees and line a baking sheet with parchment paper.
2. In a small bowl, whisk together olive oil and maple syrup.
3. Pour the mixture over prepared strawberries and toss to coat (you can do this in a bowl, but I often do it with my hands directly on the baking sheet because it means one less bowl to clean).
4. Sprinkle a generous pinch of salt over the strawberries.
5. Roast for 30 minutes, until collapsed and jammy.

Raw Chocolate Sauce
1. In a small bowl, whisk the olive oil, maple syrup and salt together.
2. Sift in the cacao powder and whisk well.

Marinated Asparagus, Red Onion & Goat Cheese Salad

If you read my first-of-the-season asparagus recipe post, you'll already know that this oft-coveted springtime vegetable was a reeeeeally hard sell for me. Like, 27 years of life hard sell. But eventually, as my taste buds and my psychological aversion to vegetables both evolved, I began to willingly eat these green stalks of goodness. The recipe that was the asparagus turning point for me is actually the one I'm sharing with you here. It was created by one of the chefs at my former place of employment (hey, Mike!), who made this for staff lunch one day. It blew me away, not only because it was delicious, but because it was RAW. Raw asparagus?! Who would ever think to eat such a thing?! As it turned out, I actually like the taste of raw asparagus better than cooked because I find its flavor to be more mild. It also retains more of its vitamins and minerals when consumed raw. Letting it marinate in some acid, like we do here, also helps break down its starches which makes it softer and easier to digest. Win-win!

Asparagus: All the Best Anti-'s

I'm sure it comes as no surprise that asparagus is crazy good for you. While it is not in the cruciferous vegetable family (think cauliflower and cabbage), it contains comparable levels of anti-oxidants and anti-inflammatory phytonutrients as these powerhouse vegetables. Its antioxidant profile includes beta-carotene, vitamin C, vitamin E, zinc, manganese and selenium. Eating a diet rich with anti-inflammatory and anti-oxidant foods is essential to ward off some of today's most prominent diseases—type 2 diabetes and heart disease—which develop out of chronic inflammation and oxidative stress in our bodies. Vegetables like asparagus help keep our bodies in balance and these diseases at bay. Food is medicine, y'all! 

Another health-supportive property of asparagus is its incredible B-vitamin content. One of the main responsibilities of B-vitamins is to convert the food we eat (carbohydrates, fats and proteins) into into fuel (glucose), which then gives us energy. Because they play a key role in this metabolization process, they are essential in maintaining healthy levels of blood sugar. Asparagus contains high levels of vitamins B1 B2 and B6, folic acid (B9), niacin (B3), choline and pantothenic acid.*

*Nutritional information from WHFoods and University of Maryland Medical Center.

Marinated Asparagus, Red Onion & Goat Cheese Salad
Serves two
Recipe adapted from Mike de la Torre

Ingredients
1 bunch asparagus
1/2 medium red onion
1 large Meyer lemon (regular is okay too if you can't find a Meyer), zest and juice
3 Tbsp. good quality cold-pressed olive oil
generous pinch of salt
1/4 cup raw almonds
goat cheese, to finish
soft boiled egg (optional)

Directions
1. Slice the onion into very thin half-moons. 
2. In a medium bowl, zest the lemon and then squeeze 1/4 cup's worth of juice into the bowl.
3. Add the onion slices, toss with the lemon juice, add a generous pinch of salt and set aside.
4. Cut off the woody bottom third of the asparagus stalks. Slice the remaining tender part of the stalks on a diagonal into 1/4" thick coins.
5. Add the asparagus to onions and toss to coat.
6. Heat toaster oven to 325°F. Toast the almonds until fragrant, about 10-12 minutes, tossing halfway through. Roughly chop.
7. Add the olive oil to the marinated asparagus and onions, gently mix, and transfer to your serving bowl. Add chopped almonds and your desired amount of goat cheese. Season with salt and pepper to taste. Finish with a soft boiled egg, if desired.

Homemade Ricotta Cheese

This is a guest post written by Jill Hammond.

I didn't grow up eating ricotta, so I have been in the dark for most of my life. Once I discovered that it basically tastes like cream cheese but better, I've been completely obsessed with it. I put it on everything—savory or sweet—and I regret nothing.

I'd love to tell you ricotta is full of wonderful health benefits, but the truth is, it's still cheese. If you are on a low calorie or vegan diet, read no further. If you're in, you'll be pleasantly surprised by how easy and rewarding this quick recipe is. So much so, in fact, that you'll also be embarrassed you've been buying ricotta from the store your whole life. But don't sweat it too much; you're here now and once you've made this, you'll see the light.

Homemade Ricotta Cheese
yields two cups
Recipe from
The Kitchn

What You'll Need:

  • 1/2 gallon whole milk

  • 1/3 cup lemon juice

  • 1 teaspoon salt

  • 4-quart stock pot

  • Instant read thermometer

  • Cheese cloth

  • Strainer

  • Mixing bowl

  • Slotted spoon

Instructions:
1. Pour the milk into a 4-quart pot and set it over medium heat. Let it warm gradually to 200°F, monitoring the temperature with an instant read thermometer. The milk will get foamy and start to steam; remove it from heat if it starts to boil.
2. When it reaches 200°F, remove the milk from heat and add in lemon juice and salt.
3. Let the pot sit for 10 minutes. The milk will separate into curds and whey. If you still see a lot of un-separated milk, add another tablespoon of lemon juice and wait a few more minutes.
4. Set a strainer over a bowl and line the strainer with cheese cloth. Scoop the big curds out of the pot with a slotted spoon and transfer them to the strainer. Pour the remaining curds and the whey through the strainer.
5. Let the mixture drain for 10 to 60 minutes, depending on how wet or dry you prefer your ricotta. If the ricotta becomes too dry, you can also stir some of the whey back in before using or storing it.

Use or store the ricotta:
Fresh ricotta can be used right away or refrigerated in an airtight container for up to a week. This recipe yields two cups of rich, delicious ricotta. I enjoy it on toast as a cream cheese replacement with literally any other ingredient (jam, olive oil, chili oil, smoked salmon, etc.)—the options are endless.

Notes:

  • Don't ditch the whey! Whey is considered a complete protein with amino acids and low lactose content. If you want to use it, which you totally should, you can add it to smoothies or use in any baking recipes in place of water.

  • Avoid using ultra high temperature (UHT) pasteurized milk, since this may impact how the milk separates.

Asparagus, Caper & Toasted Almond Tartine

Living in California, the seasonal transitions are almost marked more by the rotations of produce that adorn farmers' market stalls than by drastic shifts in weather. Each season has its show stoppers, the fruits or vegetables that define a particular time of year. For springtime, it's asparagus. (Okay, and green garlic and probably a few other things, but asparagus is definitely high up on that list.) Some people probably wait all winter long to see those lean, green stalks appear at the market. No offense, but these people seem absolutely nuts to me.

Let's be real: asparagus is a challenging vegetable. It is potent (some may argue pungent) in flavor and scent. I hated it until, um, last year. I still don't love it. But! I have been introduced to methods of preparing asparagus that compliment or mellow its taste in ways that make it palatable if not even, dare I say it, delicious. The most recent method—which was so good that it is now the subject of this post—came by way of my boyfriend, who (conveniently for me) is a pretty spectacular cook. I was decidedly disinterested the evening he excitedly proclaimed he had bought a bunch of asparagus and I remained so when he later departed to the kitchen to turn it into a "snack". Twenty minutes later, drawn to the kitchen by the sweet smell of toasty almonds and browning butter, I found my anti-asparagus resolve melting away. I leaned towards his plate to examine its contents, was offered a bite, and succumbed. I was immediately dumbfounded. Staring at T in disbelief, I demanded to know what he put in that thing to make the asparagus taste so delicious. And then I ate half the food on his plate.

I knew immediately that I needed to share his divine and startlingly simple concoction with you. At the start of spring, so you can make it for yourself and then for your friends and then for your family and then for yourself again, all before the season ends. So, what are we waiting for?

Springtime Asparagus Tartine
Makes four generous tartines

Ingredients
1 bunch asparagus (preferably skinny stalks)
1 Tbsp. ghee or butter (sub cold-pressed olive oil if you're vegan)
1/2 Tbsp. dry white wine (or juice from half a lemon)
1/4 cup raw almonds
2 Tbsp. capers (preferably salt preserved), rinsed
1/4 cup flat-leaf parsley, minced
2 large slices of fresh, crusty Boule (whole grain blend & sourdough are great), cut in half
salt & pepper, to taste

Method
1. Heat oven or toaster oven to 325°F. Spread almonds on a baking sheet and toast until fragrant, 10-12 minutes, tossing halfway through.
2. While the almonds are roasting, prep asparagus. Cut the woody bottom third off all the stalks and discard. Cut the remaining stalks into 1 1/2" segments.
3. When the almonds are toasted, remove from the oven and roughly chop. Set aside.
4. Heat the butter or ghee in a large, heavy skillet over medium heat. When hot, toss in asparagus, reduce heat to medium low, and sauté, gently stirring, until the spears start to become tender and acquire a bit of color, about 5 minutes.
5. While the asparagus is cooking, brush your bread slices with a bit of olive oil and toast them (or char them on a grill if that's accessible!).
5. Add a generous pinch of salt and some fresh ground pepper to the asparagus and stir.
6. Add your glug of white wine or squeeze of lemon juice to deglaze the pan. When stirred, it should emulsify with the oil and create a sauce-like glaze over the asparagus. Taste for doneness; you want the asparagus to be cooked but still have a bit of crunch to it.
7. Remove the pan from the heat. Toss in the capers, minced parsley and chopped almonds. Toss to combine.
8. Pile the asparagus mixture high onto each slice of toast. Enjoy immediately.

Roasted Pear & Ginger Skillet Crumble

I have a confession to make: I have a massive sweet tooth. I stare, aghast and confused, at people who say they don't like chocolate; will happily drive from the East Bay to SF just to get a Tartine morning bun; and eat potentially dangerous amounts of cookie dough straight from the bowl. Ironically, I am also a mild health nut. I vigilantly read the ingredients on every packaged item I buy; love seeing a spectrum of radiant hues on my plate; and am well educated on the horrors that refined sugar inflicts on our bodies. As you may imagine, it is oftentimes difficult to reconcile these two things. 

I began slowly. When baking, I swapped out portions white flour for whole wheat or spelt in recipes. Used molasses-rich, unrefined muscovado instead of brown sugar; a bit of apple sauce instead of oil. And then I discovered dates: nature's carmel. The one incredible whole food, chock full of fiber and nutrients, that could conceivably pass as candy, could serve as the binder in raw truffles and sweeten oatmeal so well that sugar or maple syrup became superfluous. My palate and cravings shifted and I began to savor the creativity in experimenting with making decadent treats that would also make my body feel good. Full disclosure: this crumble is one of those treats.

Arguably the best thing about this dessert is that it is free of refined sugar, gluten and dairy, yet no one who eats it would ever know. It is a wonderful dessert for these chilly winter months when you're still craving something sweet, warm and comforting while trying to take a break from the indulgence that the holidays inevitably bring. Plus it's perfect for your vegan and gluten-free friends! Everybody wins.

While traditional crumbles build their topping from butter, white flour and refined sugar, this version uses a variety of nuts, spices, and muscovado sugar to create its crunchy, crumbly crust. The nuts provide our bodies with protein, vitamins, minerals and heart-healthy mono-unsaturated fats, which help lower LDL (the "bad") cholesterol levels and increase HDL (the "good") cholesterol in our blood. Muscovado, while certainly still sugar, is an unrefined variety that retains much of the nutritional value of the molasses (which is super high in iron!) that gives it its distinct, rich flavor. I was surprised when I first learned that brown sugar is subjected to the same refinement process and chemical treatment as conventional white sugar—it just has the molasses is added back in after—but c'est vrai

Truth be told, pears were never a fruit that particularly wowed me until I was subjected to the bleak yield of winter produce while living in the UK. In those dark months, they were a most welcome respite from the unending root vegetables and hardy winter greens that filled my local farmers' market stalls. Maybe it was the desperation, but I swear those pears were more succulent than any I had ever tasted. They completely won me over and created the spark for this roasted winter crumble. It's adapted from a recipe by the ever-inspiring Sarah B. of My New Roots, who created hers in the summertime using raw peaches. That's part of what I love about it though: the formula. Swap the peaches for pears in the winter, or figs in the summertime, apples in the fall, apricots in the spring. You really can't go wrong.

Roasted Pear & Ginger Skillet Crumble
Adapted from My New Roots' Peachy Keen Raw Cobbler

Ingredients
Filling
10 pears (I used D'Anjou, but Bartlett, Bosc and Comice would work well too)
1 Tbsp. coconut oil, melted
1 tsp. cinnamon
1/2 lemon, juice & zest
2" piece ginger root, grated
5 Medjool dates, pitted
1 tsp. vanilla extract

Topping
1/2 cup raw brazil nuts
1/2 cup raw walnuts
1 cup raw pecans
1/4 cup muscovado sugar
1 tsp. cinnamon
1/2 tsp. ground ginger
1/4 tsp. sea salt

Method
1. Preheat oven to 350°F/177°C. Cut pears into 1/2" cubes.
2. In a roasting pan, toss pears with coconut oil and cinnamon. Roast until soft, about 30 minutes, mixing halfway though.
3. Meanwhile, pulse all topping ingredients in a food processor until roughly crumbly (not nearly as fine as sand). Pour out and set aside.
4. Once pears have roasted, put 1 cup of of the pears in the food processor along with the lemon juice and zest, grated ginger root, dates and vanilla extract. Blend until it is completely puréed. 
5. Place the remaining roasted pears In a well oiled cast iron skillet (or a pie or cake pan if you don't have one). Pour the filling purée over the pears and gently mix them together. Smooth the filling flat and sprinkle the nut crumble evenly on top.
6. Return to oven and cook until nuts are toasty, 10-12 minutes.
7. Enjoy warm. Top off with ice cream if desired!